Promotion Management
This guide explains how to create, configure, edit, and delete promotions in Distritour. The Promotions module lets you define various types of commercial offers that are automatically applied during sales operations.
Table of Contents
- Accessing the Promotions Module
- Promotion Types
- Creating a Promotion
- Promotion Form Fields
- Editing a Promotion
- Deleting a Promotion
- Automatic Promotion Application
- Exporting the Promotions List
- Bulk Actions
1. Accessing the Promotions Module
In the left sidebar, click on Promotions to open the promotions list.
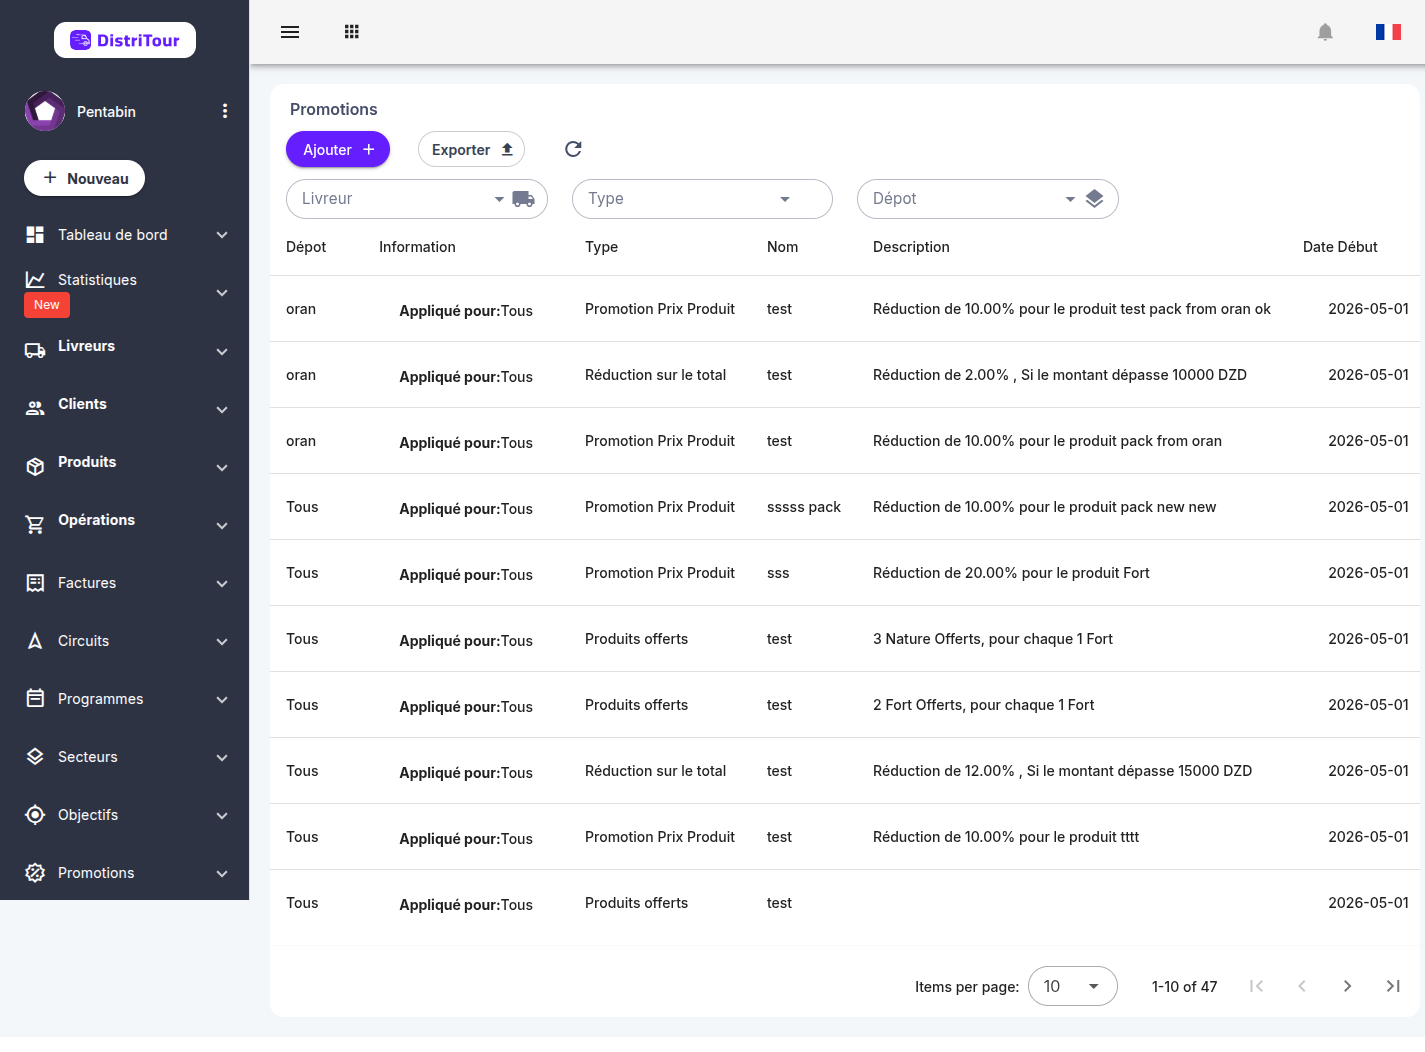
The table displays the following columns:
| Column | Description |
|---|---|
| Type | Promotion type (Discount on Total, Offered Products, etc.) |
| Name | Promotion name |
| Description | Auto-generated summary of conditions and the offer |
| Start Date | Date from which the promotion is active |
| End Date | Date on which the promotion expires |
| Actions | Edit ✏️ and Delete 🗑️ buttons |
Filters: Use the filter bar to filter by carrier and by promotion type.
2. Promotion Types
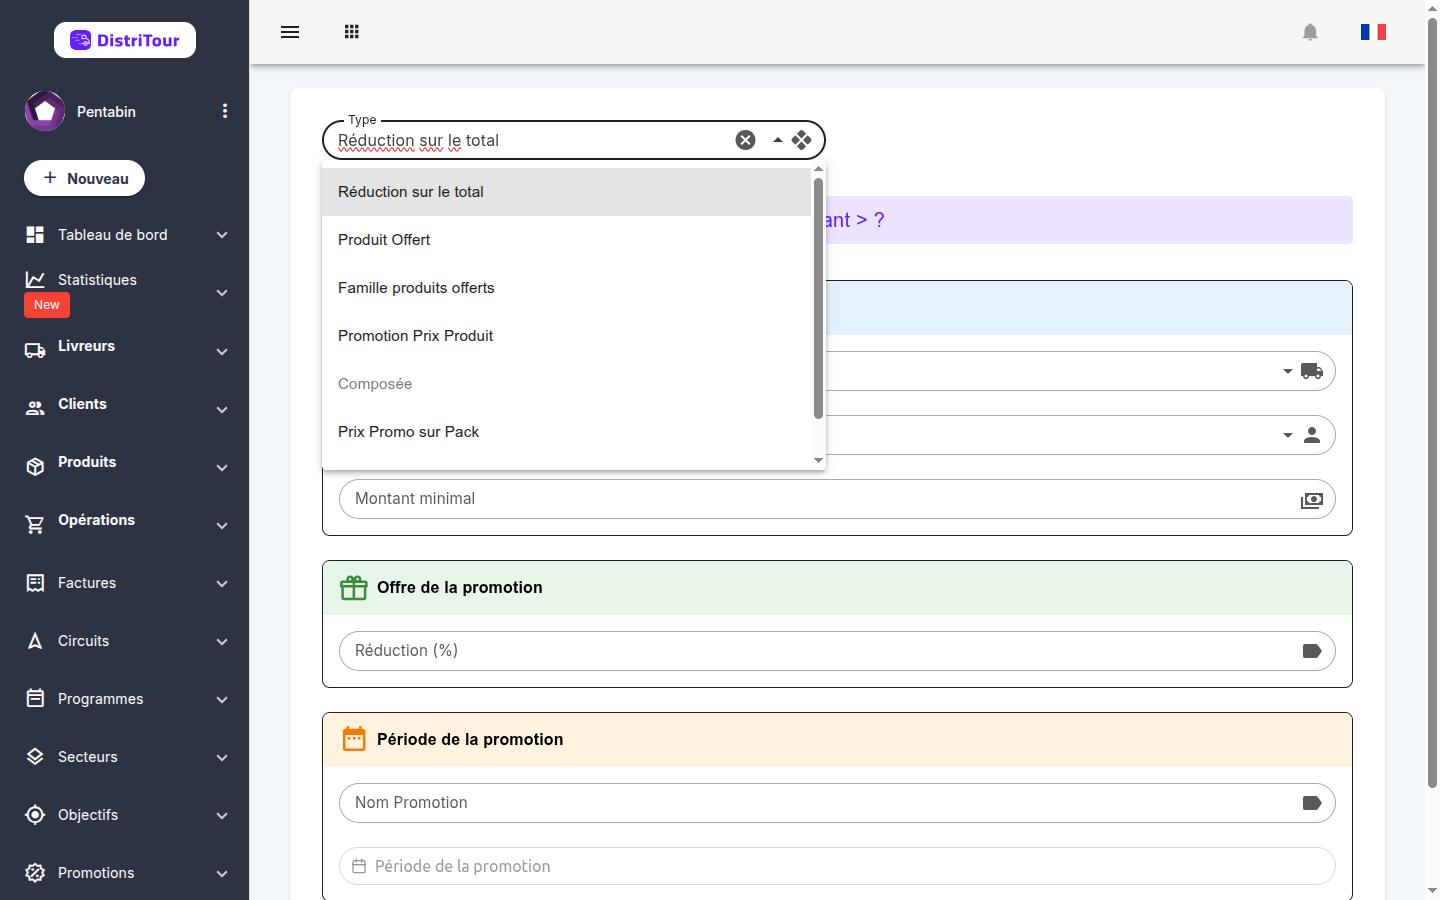
Distritour supports 6 promotion types:
| Type | Name | Description |
|---|---|---|
| 0 | Discount on Total | A percentage discount is applied to the total order amount when it exceeds a minimum threshold. |
| 1 | Offered Products | When a minimum quantity of a given product is purchased, a product is offered for free. |
| 2 | Family Offered Products | When a minimum quantity from a product category is purchased, a product is offered for free. |
| 4 | Product Price Discount | A percentage discount is applied directly to the price of a specific product when the minimum quantity is reached. |
| 5 | Promo Price on Pack | A percentage discount is applied to the price of a product pack when the minimum pack quantity is reached. |
| 6 | Offered Product on Pack | When a product pack is purchased, a product is offered for free. |
Note: The Composed type (type 3) is currently disabled.
3. Creating a Promotion
- Click the + Add button at the top of the Promotions list.
- First select the Type — this determines which fields are shown in the form.
- Fill in all the required fields across the Condition, Offer, and Period sections.
- Click Save to create the promotion.
Important: The promotion type cannot be changed after creation.
4. Promotion Form Fields
The form is split into three sections.
Section 1 — Promotion Condition
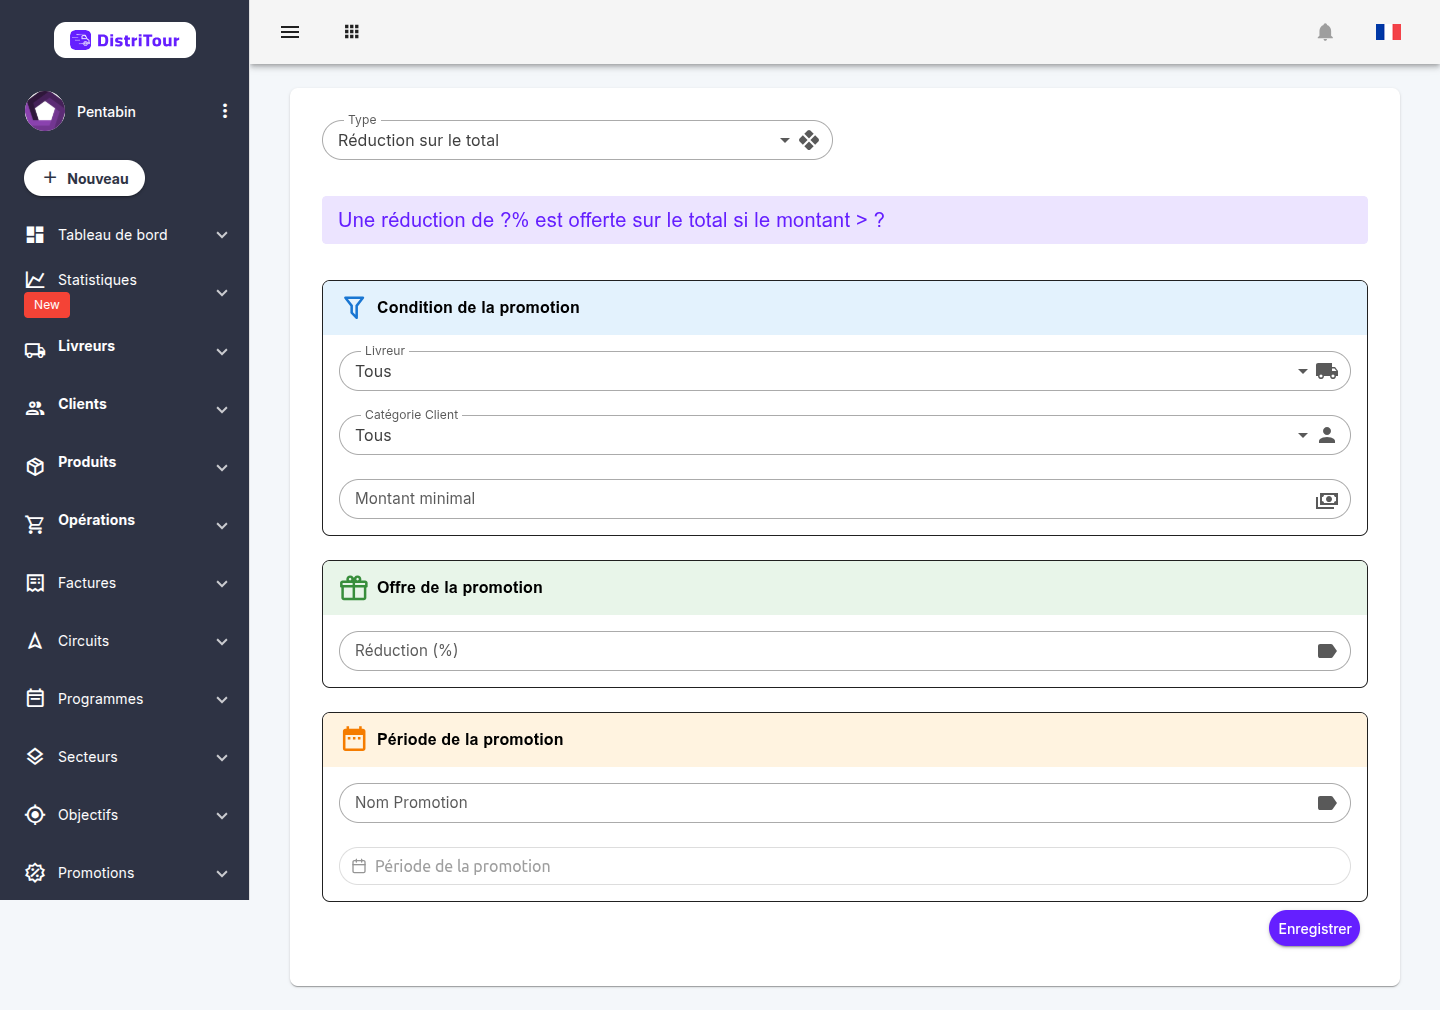
Defines who and when the promotion applies.
| Field | Applicable Types | Description |
|---|---|---|
| Carrier | All | Optional. If set, the promotion applies only to this carrier. Leave empty to apply to all carriers. |
| Client Category | All | Optional. Restricts the promotion to a specific client category. |
| Minimum Amount | Type 0 | Minimum order amount required to trigger the discount. |
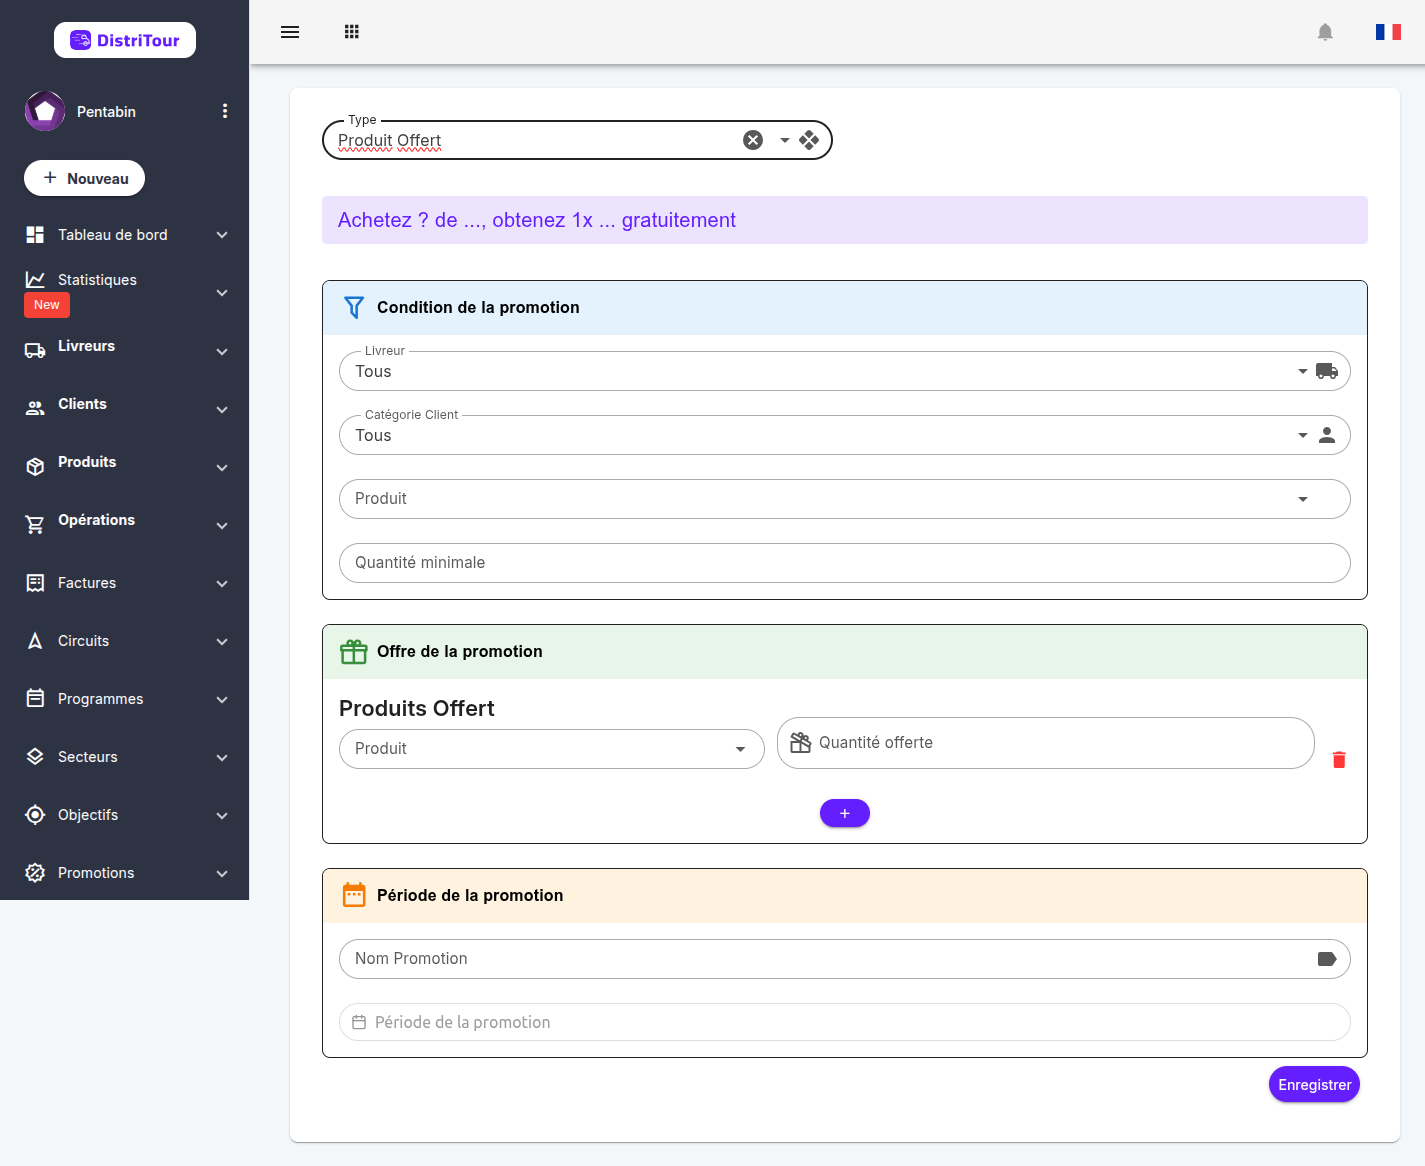
| Product | Types 1, 4 | The product whose purchase triggers the promotion. |
| Product Category | Type 2 | The product category whose purchase triggers the promotion. |
| Minimum Quantity | Types 1, 2, 4, 5, 6 | Minimum quantity to purchase for the promotion to apply. |
| Pack Configuration | Types 5, 6 | Defines the pack (name + list of products with their quantities). |
Pack Configuration (Types 5 and 6)
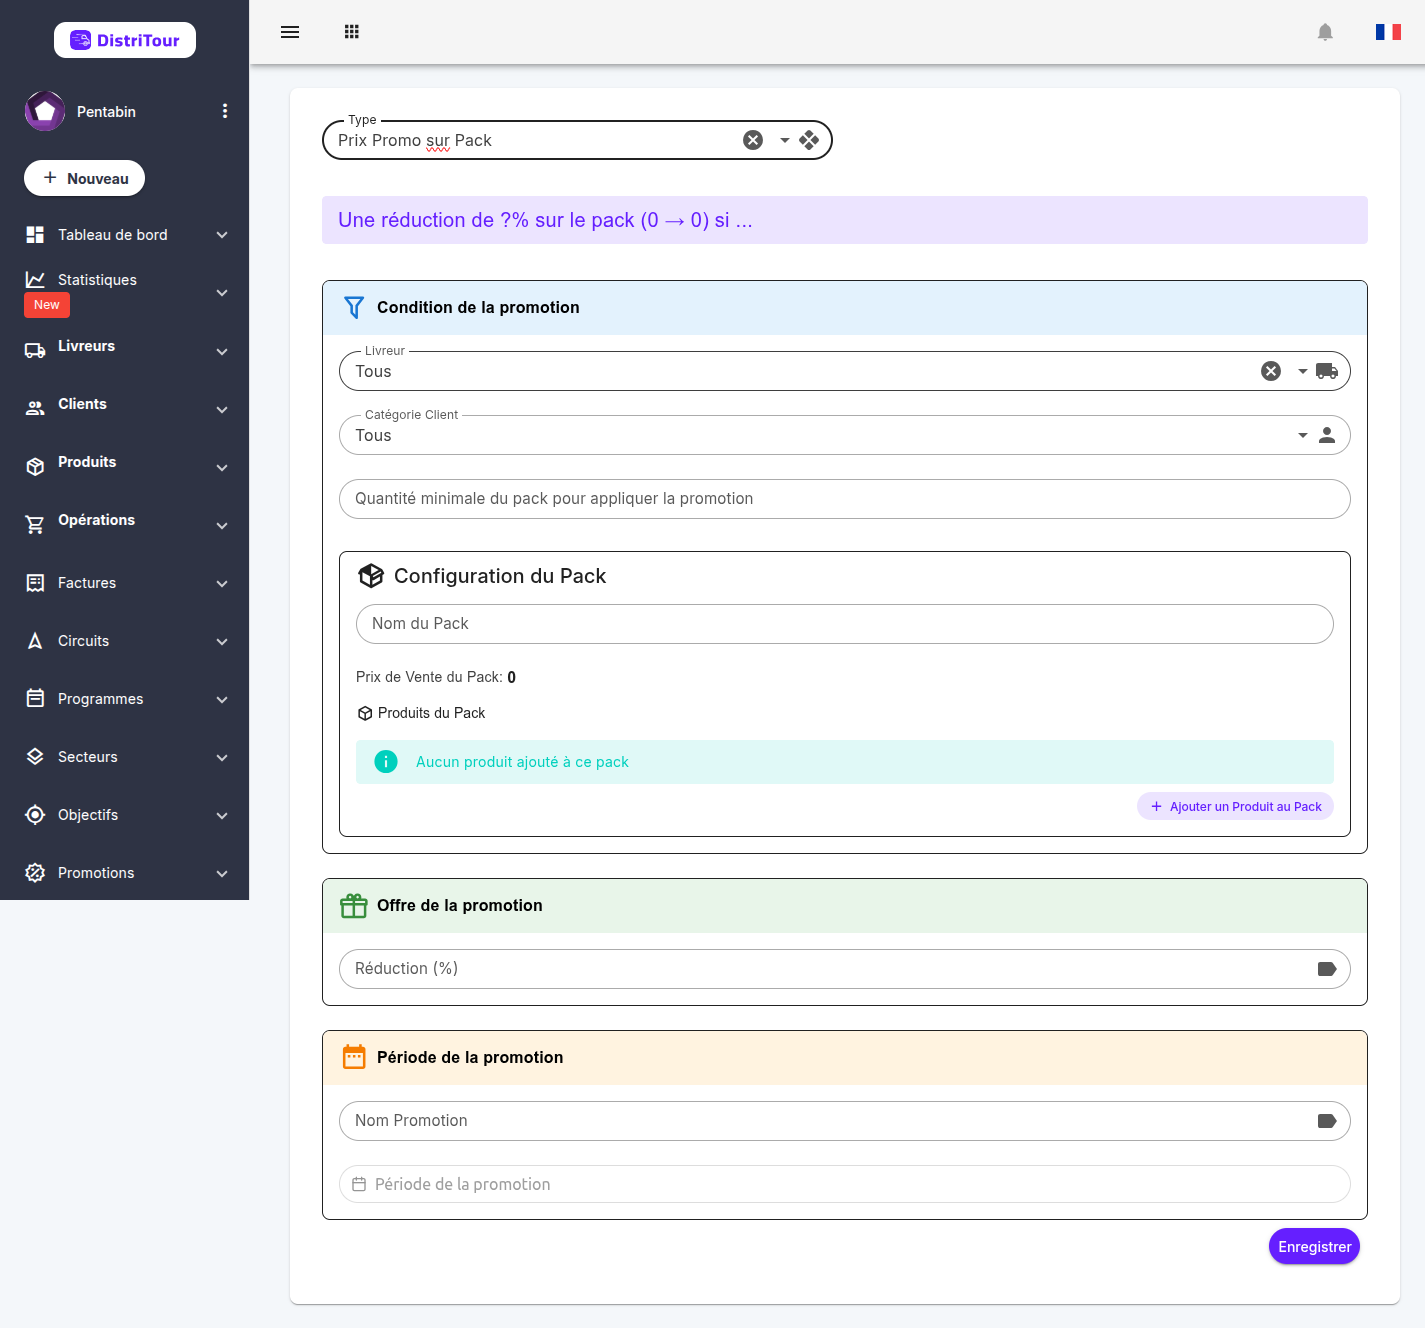
For Promo Price on Pack and Offered Product on Pack promotion types, you must configure a pack:
- Enter a Pack Name.
- Add products to the pack by clicking Add Product and entering the product and its quantity per unit.
- The Pack Sell Price is calculated automatically from the product prices. For type 5, the price after discount is displayed in real time once a reduction percentage is entered.
Section 2 — Promotion Offer
Defines what the client receives.
| Field | Applicable Types | Description |
|---|---|---|
| Reduction (%) | Types 0, 4, 5 | Percentage discount applied to the total or to the product/pack price. |
| Offered Product | Types 1, 2, 6 | The product offered for free to the client. |
| Offered Product Quantity | Types 1, 2, 6 | Number of units of the offered product. |
| Composed Pack Items | Composed type | List of required products with their minimum quantities. |
For type 1 (creation only), you can define multiple offered products with different quantities using the multi-entry interface.
Section 3 — Promotion Period
| Field | Required | Description |
|---|---|---|
| Promotion Name | Yes | A unique name to identify this promotion. |
| Period (start – end date) | Yes | Date range during which the promotion is active. Use the quick range picker or enter dates manually. |
5. Editing a Promotion
- In the Promotions list, click the pencil icon ✏️ on the promotion row.
- Update the desired fields — the type cannot be changed.
- Click Save to apply your changes.
6. Deleting a Promotion
⚠️ Warning: Deleting a promotion is permanent.
- In the Promotions list, click the red trash icon 🗑️ on the promotion row.
- Confirm the deletion in the dialog that appears.
7. Automatic Promotion Application
Active promotions are automatically applied during operations (deliveries, orders) according to the following rules:
- Promotions are evaluated each time the operation is modified.
- When multiple promotions of the same type are eligible, the system applies the most advantageous one using these rules:
- Discount on Total: The promotion with the highest minimum amount threshold is preferred.
- Offered Products: The promotion with the highest minimum quantity is preferred.
- Product Price: The promotion with the highest discount percentage is applied.
- Promotions can be restricted to a specific carrier or a specific client category; otherwise they apply to all.
- An "ACTIVE PROMO" badge is displayed in the operation interface when a promotion is being applied.
- The amount saved is shown to the operator in real time.
8. Exporting the Promotions List
- In the Promotions list, click the Export button in the toolbar.
- The system generates a CSV/Excel file containing the currently displayed promotions (based on active filters).
9. Bulk Actions
The promotions list supports bulk actions — select multiple promotions using the checkboxes, then click the Actions button that appears to perform an operation on all selected promotions at once.
Available Bulk Actions
| Action | Description |
|---|---|
| Edit Dates | Modify the start and/or end date for all selected promotions |
| Delete Selected | Permanently delete all selected promotions (subject to permissions) |
How to Use Bulk Actions
- Select promotions: Check the box next to each promotion you want to include. You can also use the checkbox in the table header to select/deselect all.
- Open the Actions menu: An Actions button appears above the table once at least one promotion is selected.
- Choose an action: Click the button and select the desired action from the dropdown menu.
- Confirm: Depending on the action, a dialog will appear for you to configure and confirm the operation.
Edit Dates (Details)
When editing the dates of multiple promotions, a dialog opens with two fields:
- Start date — new start date for the selected promotions
- End date — new end date for the selected promotions