Operations - Deliveries
This guide explains how to manage deliveries in Distritour. A delivery is a sales operation where a carrier distributes products to a client. When delivering, stock is deducted based on the selected quantities and the client balance is modified according to the operation amount.
Table of Contents
- Accessing Deliveries
- Deliveries List
- Creating a Delivery
- Editing a Delivery
- Deleting a Delivery
- Additional Actions
1. Accessing Deliveries
In the left sidebar, navigate to All Operations > Deliveries to access the delivery management module.
2. Deliveries List
The main page displays the list of all deliveries performed in the system.
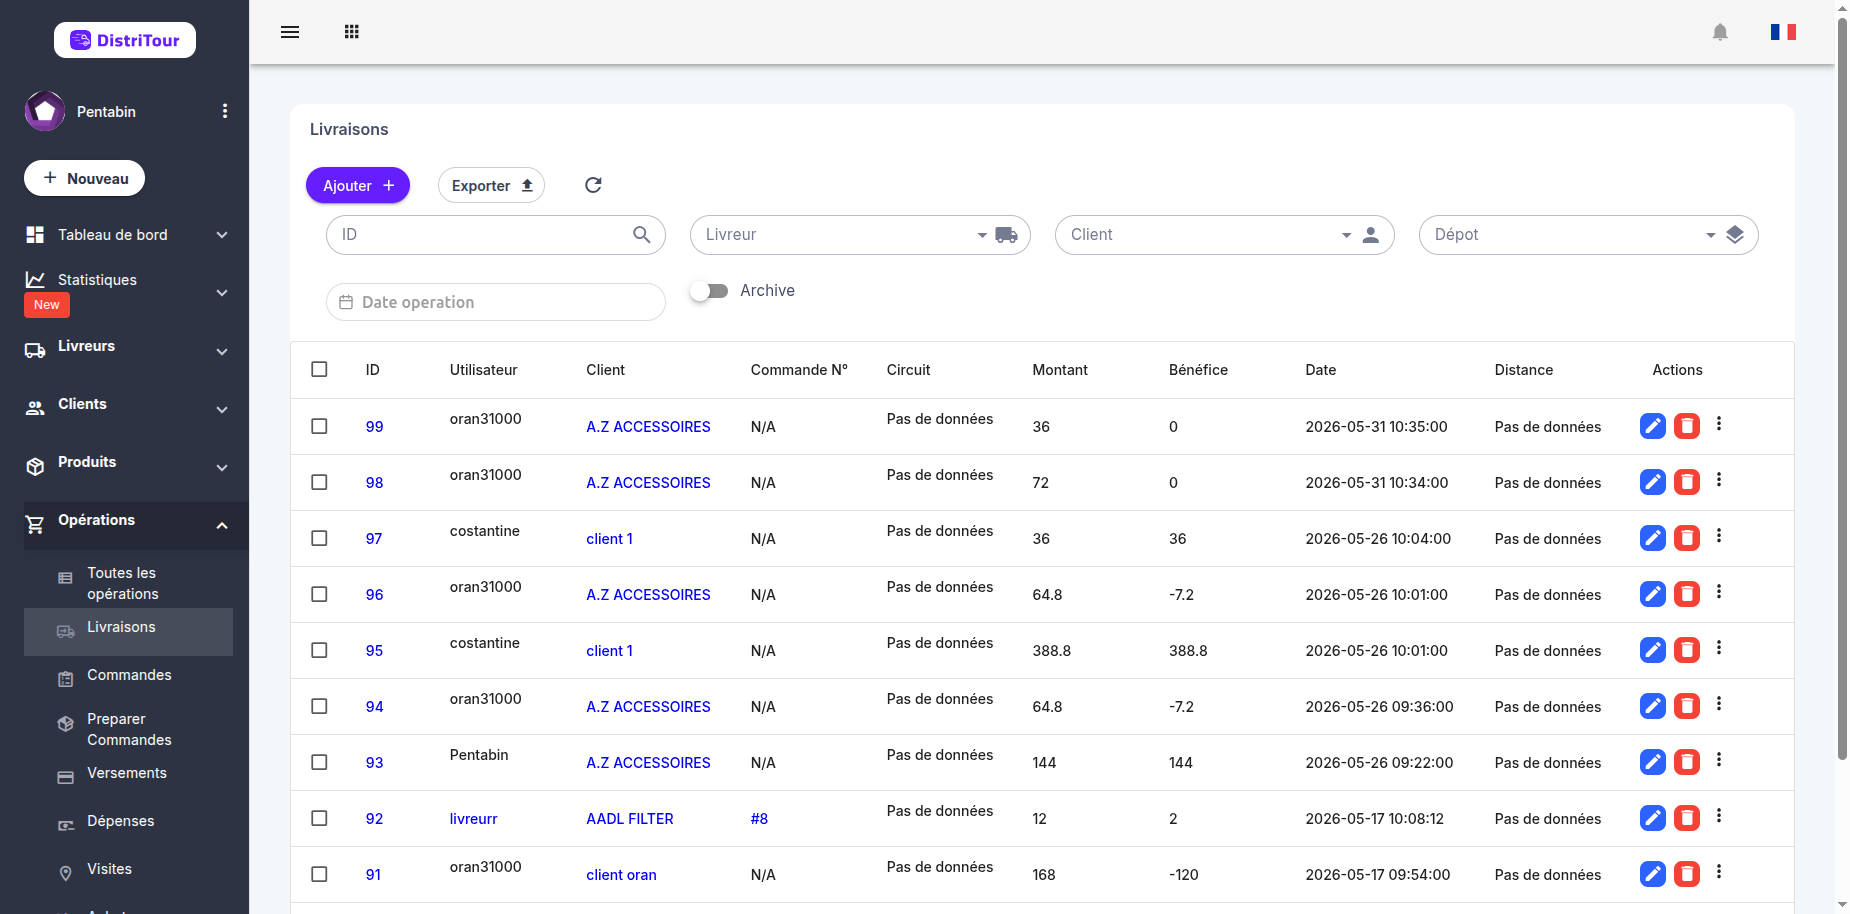
Table Columns
| Column | Description |
|---|---|
| ID | Unique identifier of the delivery (clickable to view details) |
| User | Carrier who performed the delivery |
| Client | Client receiving the delivery |
| Order ID | Associated order number (if applicable) |
| Circuit | Circuit this delivery belongs to (if applicable) |
| Amount | Total value of delivered products |
| Benefit | Profit margin of the delivery |
| Date | Date and time of the delivery |
| Distance | The distance between client and carrier at the time of the operation |
| Actions | Buttons to edit, delete, and additional actions menu (⋮) |
3. Creating a Delivery
- Click the New button at the top of the table.
- Fill in the creation form:
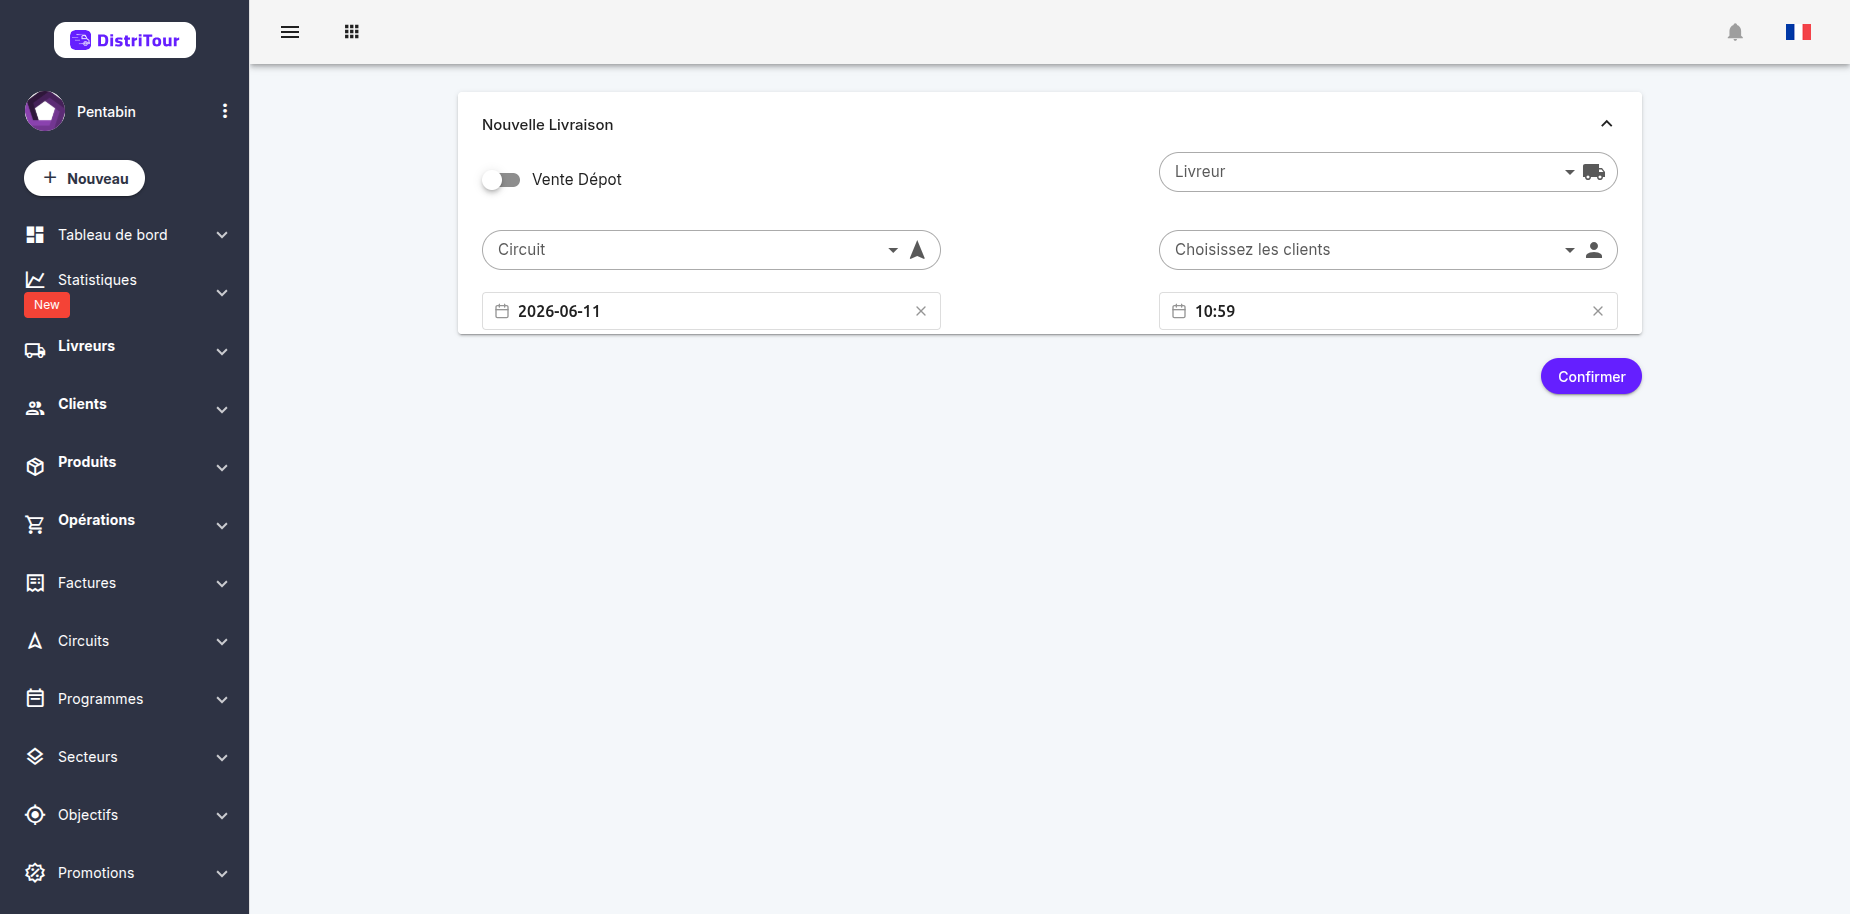
Step 1: Choose Sale Type
| Option | Description |
|---|---|
| Depot Sale | Enable this switch for direct warehouse sales. In depot sale mode, no carrier is required. |
- Normal mode (Depot Sale disabled): Select a carrier and optionally a circuit
- Depot sale mode (Depot Sale enabled): No carrier required, the sale is recorded as direct stock withdrawal
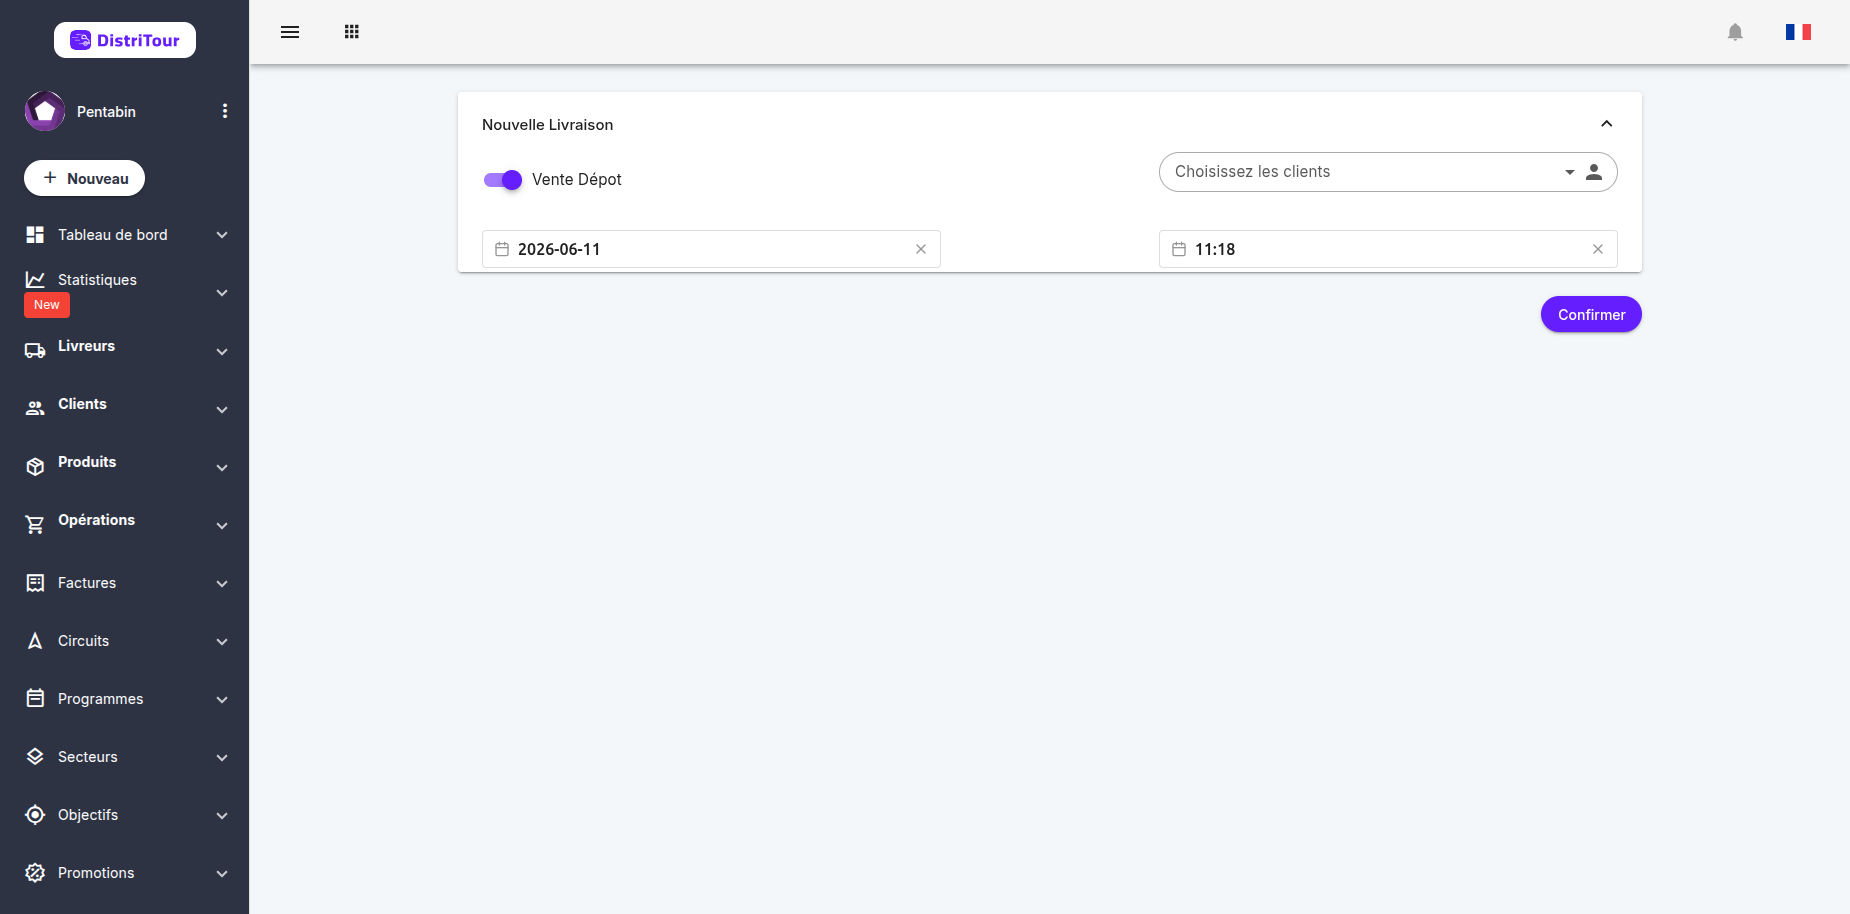
Step 2: Select Client
| Field | Required | Description |
|---|---|---|
| Carrier | Yes* | Select the carrier (*not required if depot sale) |
| Circuit | No | Circuit associated with this delivery (optional) |
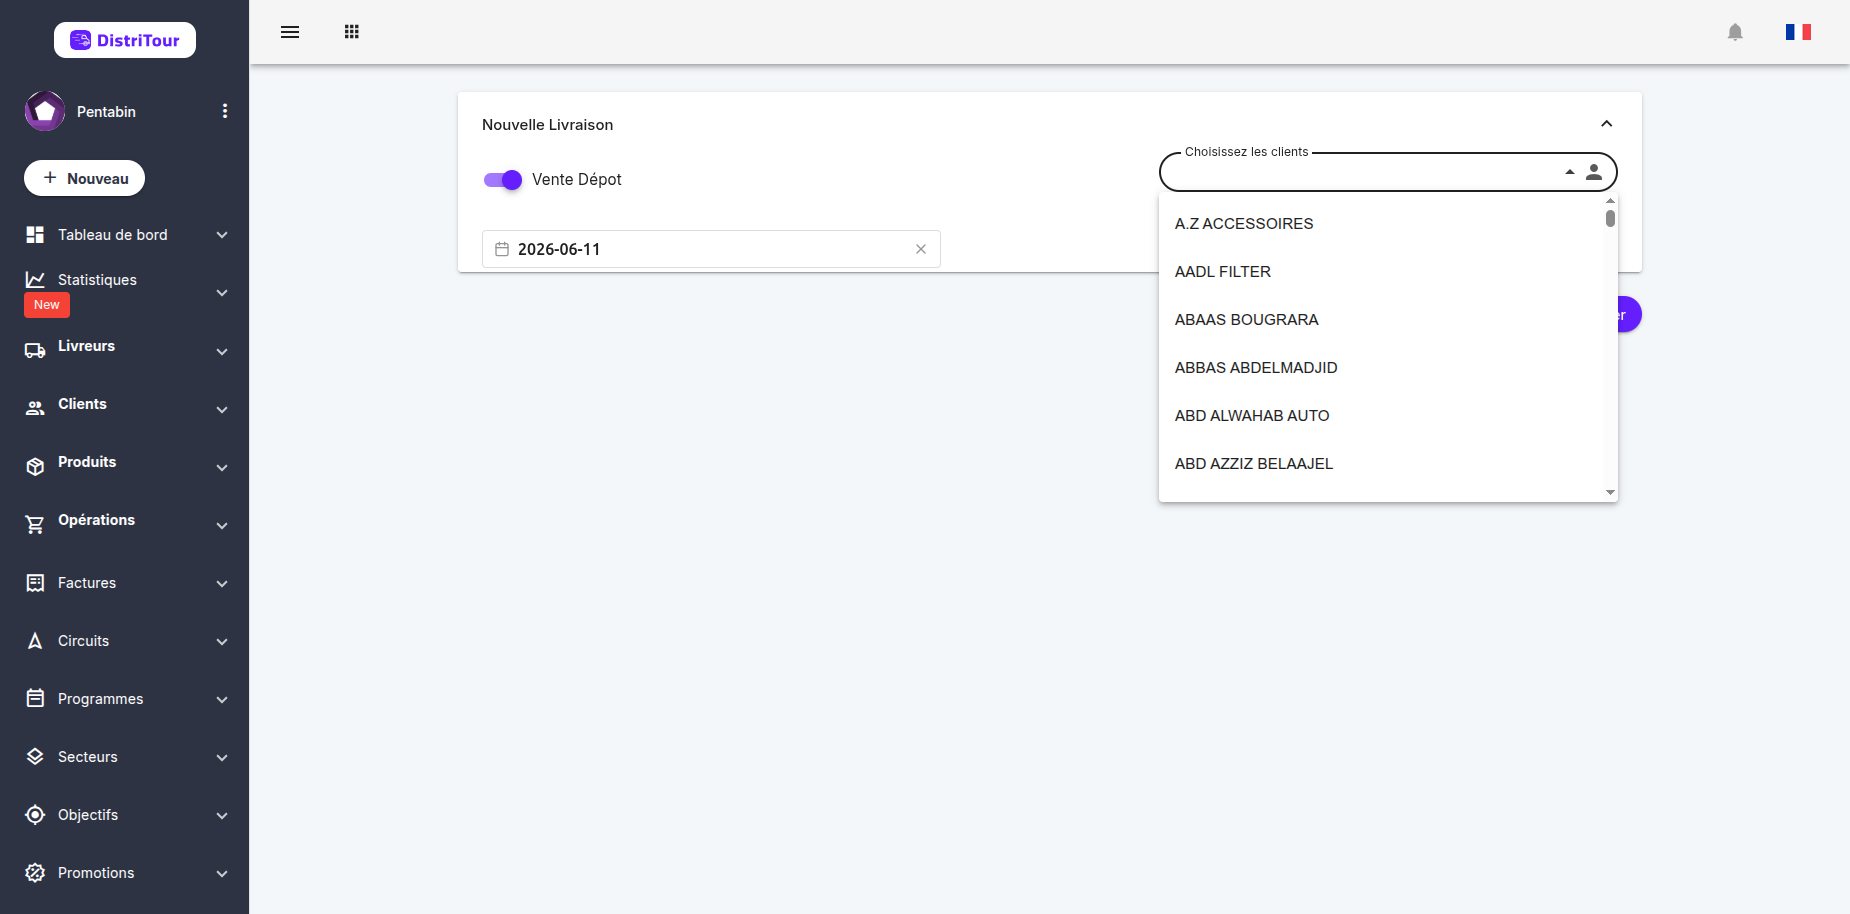
| Client | Yes | Select the receiving client from the dropdown list |
| Date | Yes | Delivery date |
| Time | Yes | Delivery time |
Important: Once the client is selected, the Items section automatically appears below with the list of available products for this client.
Step 3: Add Products
After selecting the client, the Items section automatically appears:
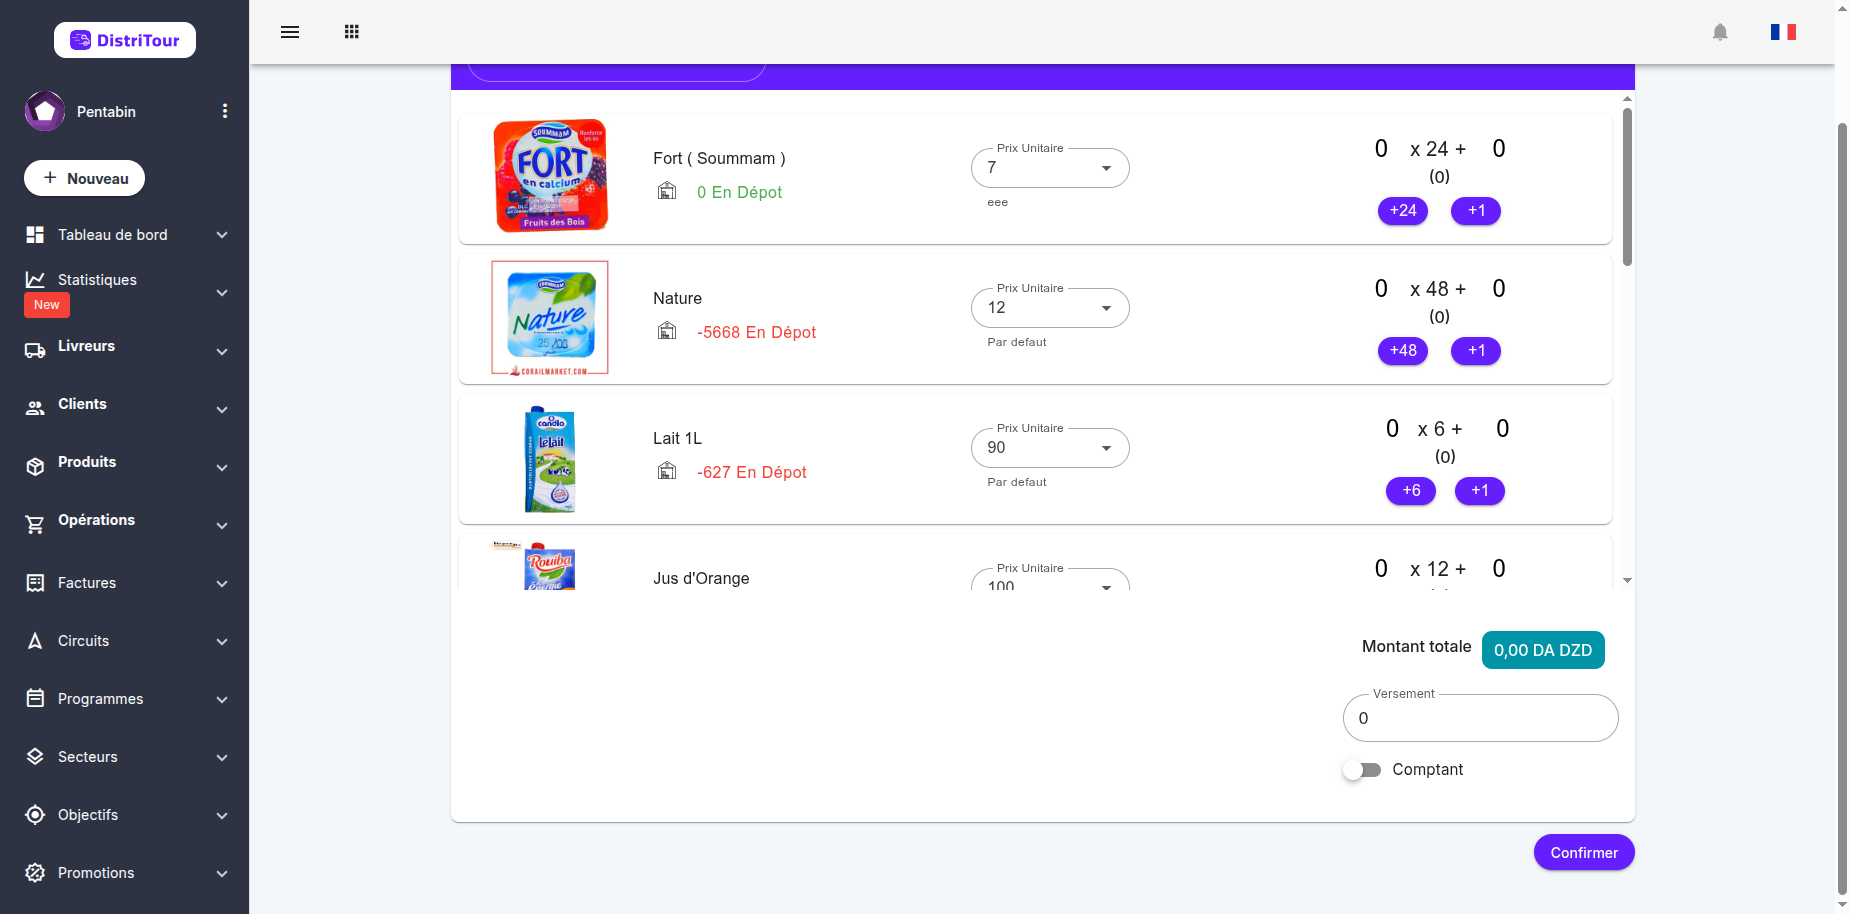
To add products:
Click the Add Item button (or the + icon)
A dialog opens with the list of available products
For each product to add:
- Select the product from the list
- Quantity: Enter the quantity to deliver
- Price: The sale price fills automatically according to the client's price grid (modifiable if needed)
- Click Add or the + icon to add the product to the list
Repeat for each product to deliver
Step 4: Payment (optional)
For new deliveries, you can specify a payment:
| Field | Description |
|---|---|
| Payment | Amount paid by the client |
| Cash | Enable this option if the client pays the full amount |
Note: The "Cash" option indicates payment of the full delivery amount.
Step 5: Review and Save
Before saving, verify:
- The added products and their quantities
- The automatically calculated total amount
- The estimated profit
Click Save to finalize the delivery.
4. Editing a Delivery
- In the list, click the ID or edit button of the delivery.
- The form opens with current data.
- Modify the desired information.
- Click Save to apply the changes.
Warning: A delivery in progress or completed cannot be modified for certain fields (carrier, circuit).
5. Deleting a Delivery
⚠️ Warning: Deleting a delivery is permanent and affects stock and statistics.
- In the list, select the delivery to delete.
- Click the delete icon in the Actions column.
- Confirm the deletion in the dialog box.
6. Additional Actions
Each delivery in the list has an additional actions menu accessible via the ⋮ (three dots) icon in the Actions column.
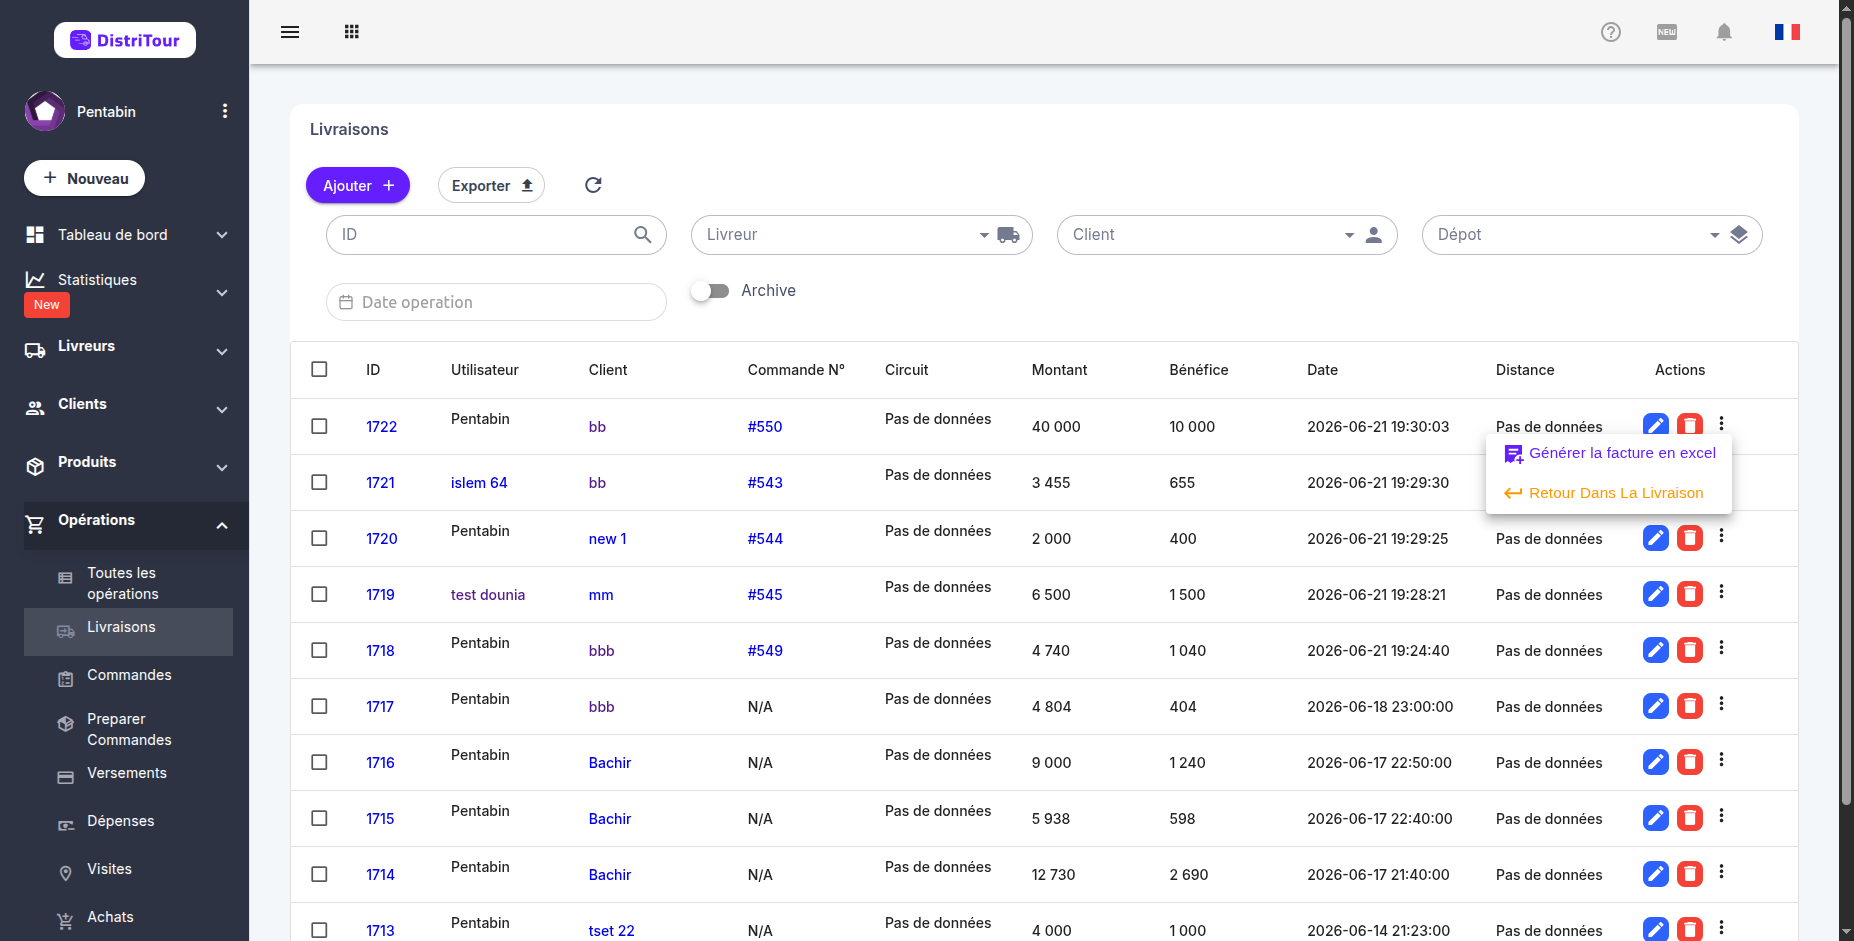
Generate Invoice in Excel
This action generates an Excel invoice for the selected delivery and opens the invoice creation page with the delivery data pre-filled.
Return In Delivery
This action creates a return directly from the delivery. It redirects to the return creation form with the delivery's products pre-loaded, making it easy to select the items to return.
See Also
- Order Management - Orders can be converted to deliveries
- Circuits - Deliveries can be grouped into circuits