Circuit Management
This guide explains how to create, manage, and track delivery circuits in Distritour. A circuit represents a delivery route assigned to a carrier, grouping the clients to visit within a defined scope.
Table of Contents
- Accessing the Circuits Module
- Circuit Types
- Creating a Circuit
- Form Fields
- Starting a Circuit
- Ending a Circuit
- Duplicating a Circuit
- Circuit Details
- Deleting a Circuit
- Exporting the List
1. Accessing the Circuits Module
In the left sidebar, click on Circuits to open the circuits list.
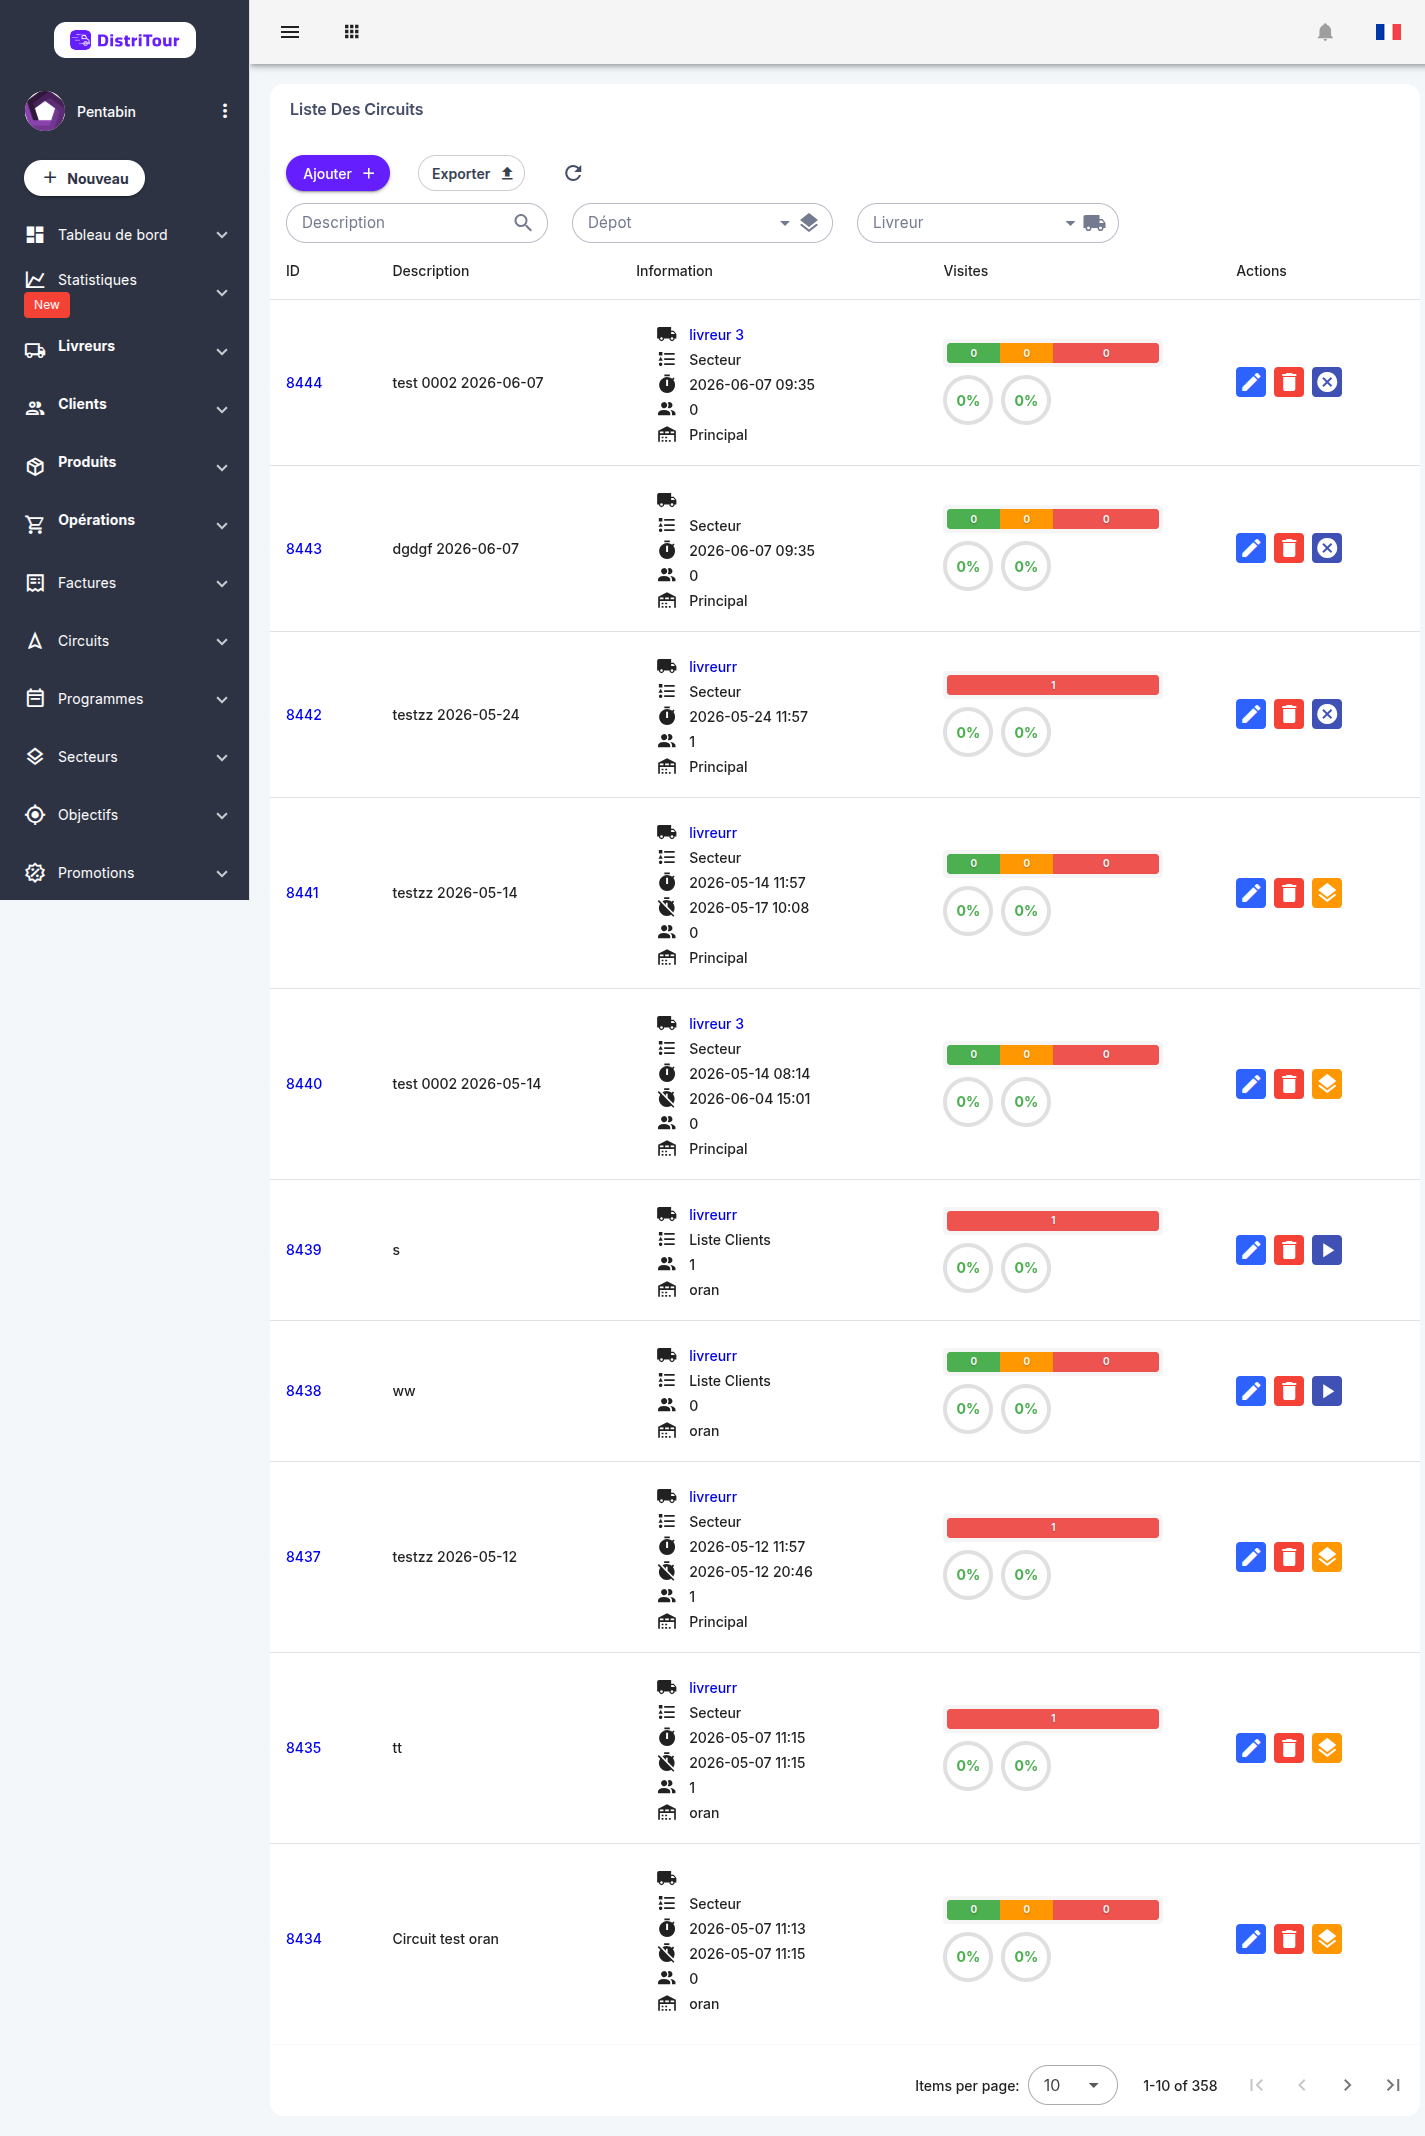
The table displays the following columns:
| Column | Description |
|---|---|
| ID | Unique circuit identifier |
| Description | Circuit name or description |
| Info | Carrier assigned to the circuit |
| Visits | Chart of total visits, visits with delivery, visit rate and success rate |
| Actions | Start, End, Duplicate, Delete buttons |
Filters: Use the filters to search by carrier or circuit type.
Visit rate: percentage of circuit clients who were visited out of the total number of planned clients.
Success rate: percentage of visits that resulted in a delivery, out of all visits made.
2. Circuit Types
| Type | Description |
|---|---|
| Open | No predefined scope. The carrier visits clients freely. |
| Sector | Based on one or more geographic sectors. Clients in the sector are automatically included. |
| Client List | Based on a manual selection of specific clients. |
Important: The circuit type cannot be changed after creation.
3. Creating a Circuit
- Click the + Add button at the top of the Circuits list.
- Select the Type of circuit.
- Fill in the fields based on the chosen type.
- Click Save to create the circuit.
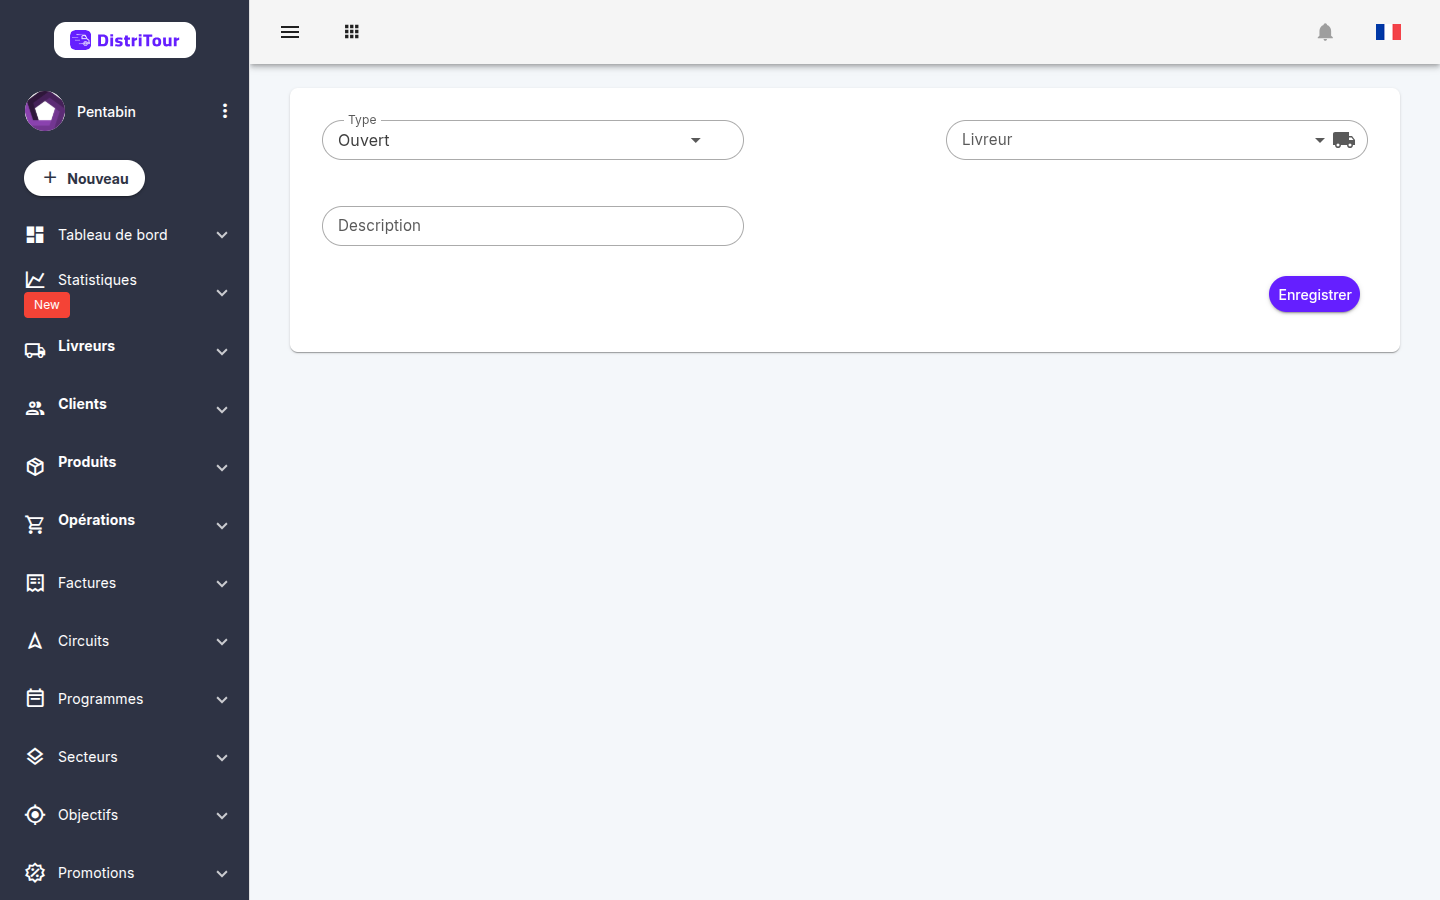
The circuit is created with a not started status. It must be started manually to become active.
4. Form Fields
| Field | Required | Description |
|---|---|---|
| Type | Yes | Circuit type (Open, Sector, Client List). Cannot be changed after creation. |
| Carrier | Yes | The carrier assigned to this circuit. Cannot be changed once the circuit is started. |
| Description | Yes | Free name or description for the circuit. Cannot be changed once the circuit is started. |
| Sectors | If type = Sector | One or more geographic sectors. Associated clients are automatically included. |
| Client List | If type = Client List | Manual selection of clients to include in the circuit. |
5. Starting a Circuit
A circuit must be started before the carrier can log operations on it.
- In the Circuits list, select the desired circuit.
- Click the Start ▶️ button in the Actions column.
- Confirm in the dialog that appears.
Once started, the Carrier and Description fields become read-only.
The carrier automatically receives the client list on their mobile app and can begin their circuit.
6. Ending a Circuit
- In the Circuits list, select the active circuit.
- Click the End ⏹️ button in the Actions column.
- Confirm in the dialog that appears.
An ended circuit can no longer receive new operations.
7. Duplicating a Circuit
Duplication lets you quickly create a new circuit with the same configuration (type, carrier, sectors/clients).
- In the Circuits list, select the circuit to duplicate.
- Click the Duplicate button in the Actions column.
- Enter a description for the new circuit in the dialog.
- Confirm.
The new circuit is created with a not started status.
8. Circuit Details
Click the ID or Description of a circuit in the list to open its details page.
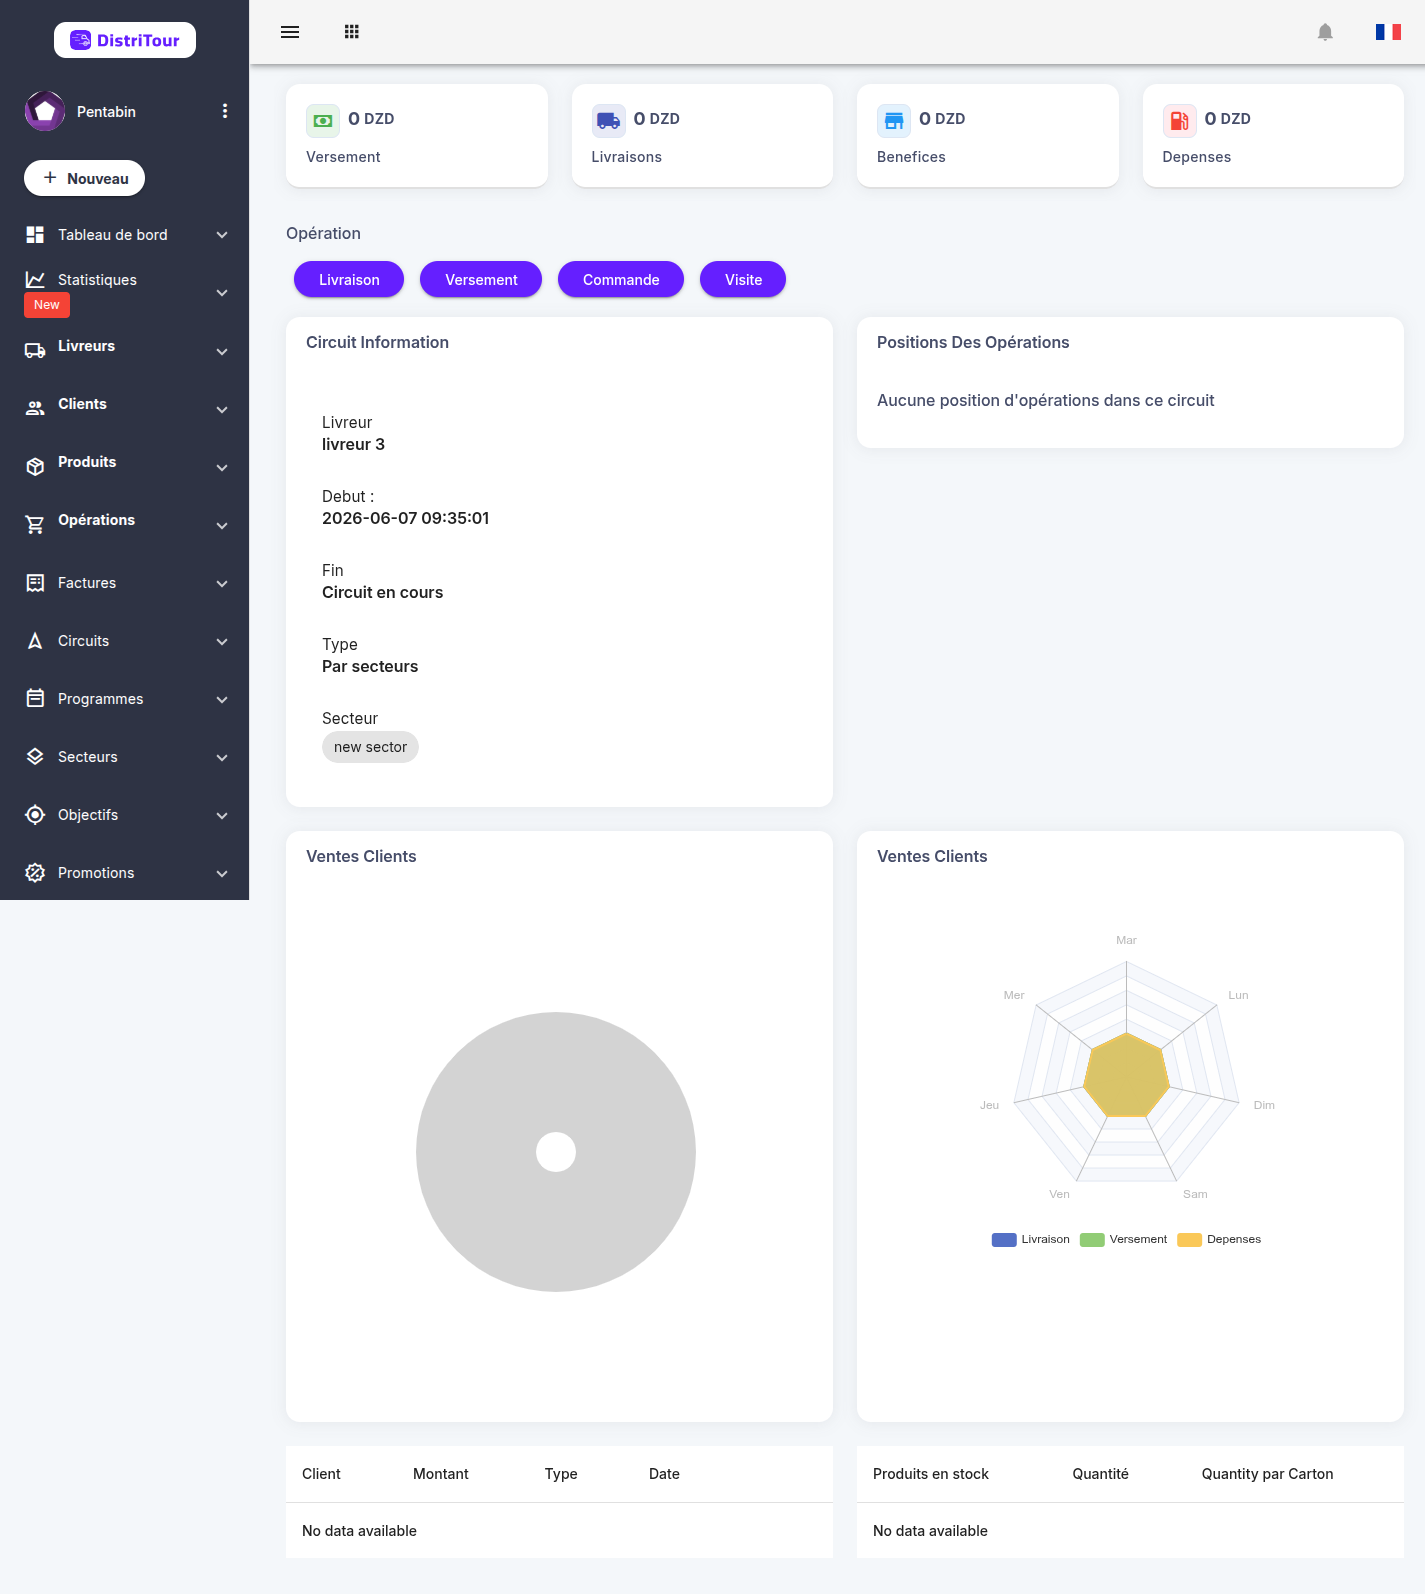
The details page shows:
- Key indicators — number of clients, number of visits, visits with delivery, revenue.
- Circuit information — type, carrier, start date, end date.
- Operations — list of operations recorded in this circuit with their details.
- Visited clients — list of visited clients with their status (with or without delivery).
9. Deleting a Circuit
⚠️ Warning: Deleting a circuit is permanent.
- In the Circuits list, select the circuit to delete.
- Click the red trash icon 🗑️ in the Actions column.
- Confirm the deletion in the dialog.
10. Exporting the List
- In the Circuits list, click the Export button in the toolbar.
- The system generates a CSV/Excel file containing the currently displayed circuits (based on active filters).