Goal Management
This guide explains how to create, configure, edit, and delete goals in Distritour. The Goals module lets you assign performance targets (quantity, revenue, products, etc.) to your carriers over a defined period.
Table of Contents
- Accessing the Goals Module
- Goal Types
- Creating a Goal
- Goal Form Fields
- Editing a Goal
- Deleting a Goal
- Tracking Progress
- Exporting the Goals List
- Bulk Actions
1. Accessing the Goals Module
In the left sidebar, click on Objectifs to open the goals list.
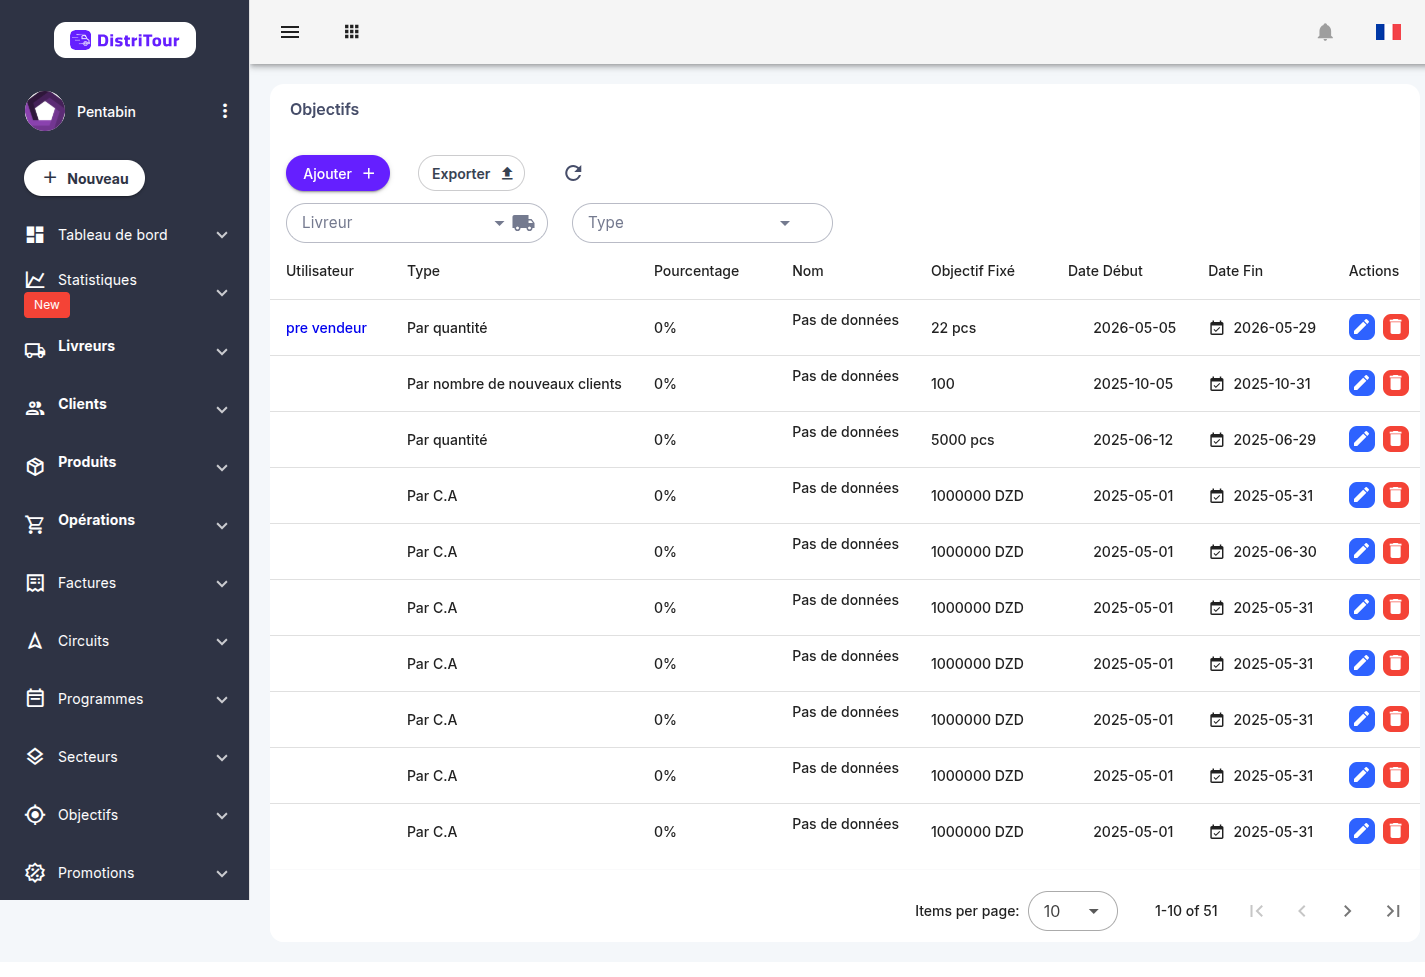
The table displays the following columns:
| Column | Description |
|---|---|
| Carrier | The carrier assigned to this goal |
| Type | The goal measurement type |
| Percentage | Current progress rate (%) |
| Name | Goal name |
| Fixed Target | The target value to reach |
| Start Date | Start of the goal period |
| End Date | End of the goal period |
| Actions | Edit ✏️ and Delete 🗑️ buttons |
Filters: Use the filter bar to filter by carrier and by goal type.
2. Goal Types
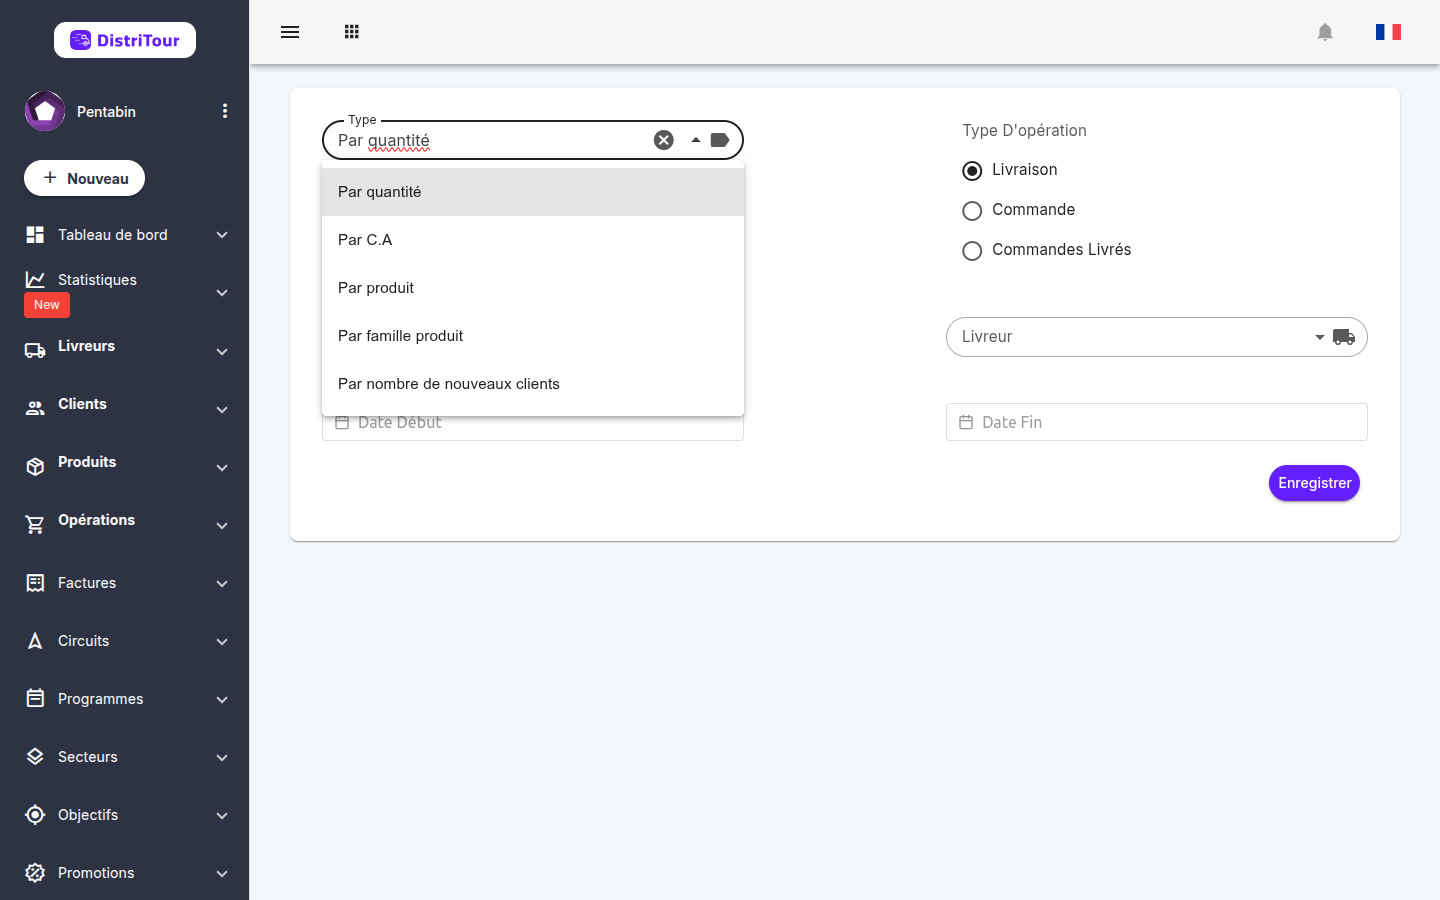
A goal can be measured by 5 metrics, of which 4 are available across 3 operation types:
Base Metrics
| Metric | Description |
|---|---|
| By Quantity | Targets a number of units to sell/deliver |
| By C.A. | Targets a revenue amount to reach |
| By Product | Targets a number of units of a specific product |
| By Product Family | Targets a number of units from a product category |
| Number of New Clients | Targets a number of new clients to acquire. Not linked to an operation type. |
Operation Types
Each metric (except Number of New Clients) can be combined with one of these 3 operation types:
| Type | Description |
|---|---|
| Delivery | Progress is tracked based on deliveries made |
| Order | Progress is tracked based on orders placed |
| Delivered Order | Progress is tracked based on orders actually delivered |
3. Creating a Goal
- Click the + Add button at the top of the Goals list.
- Select the Type (base metric).
- Select the Operation Type (Delivery, Order, or Delivered Order).
- Fill in all required fields.
- Click Save to create the goal.
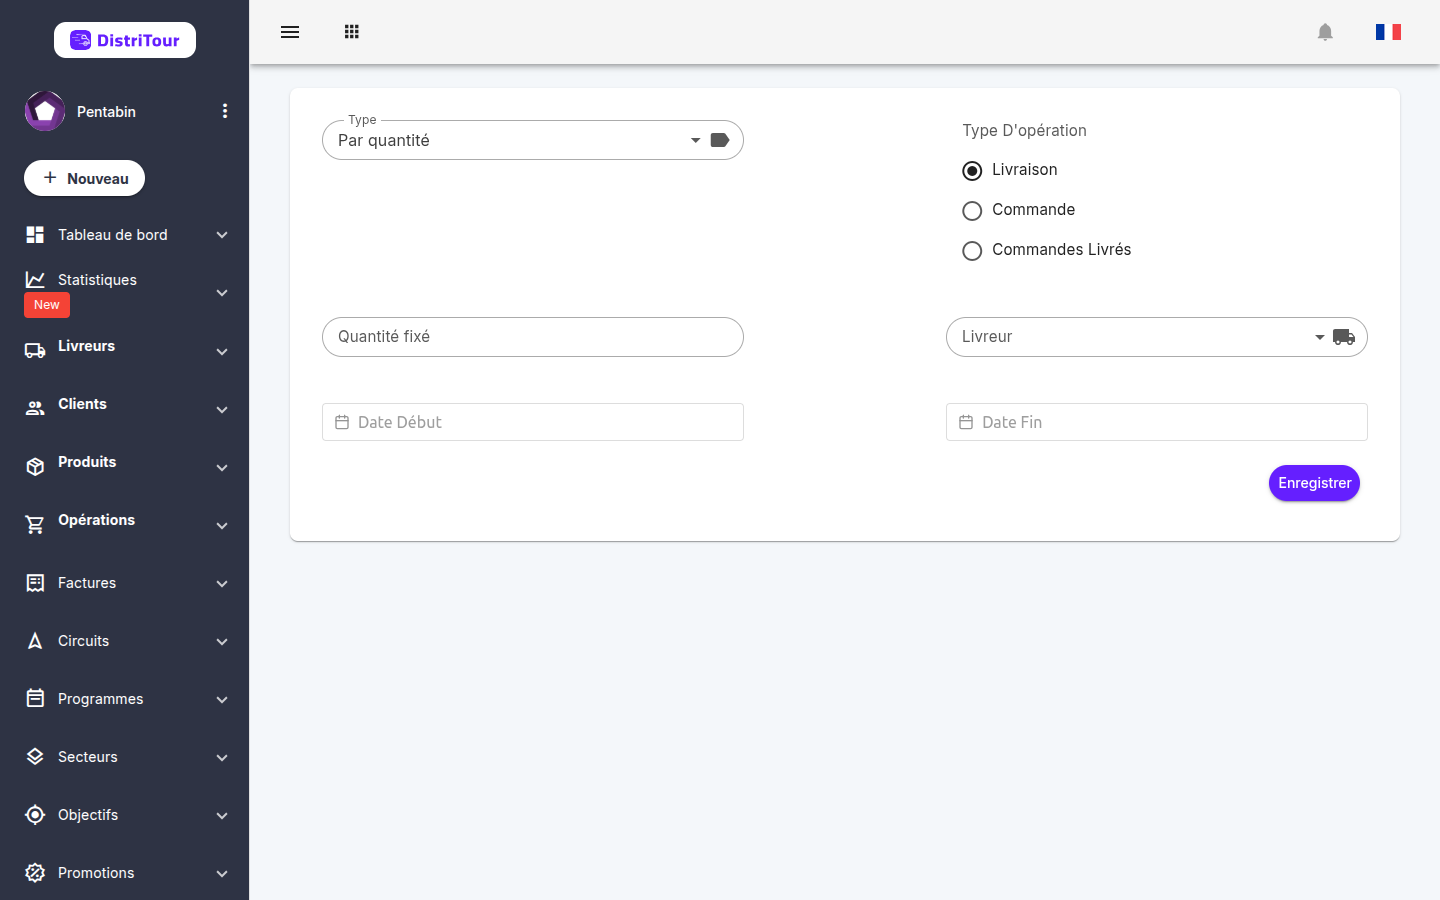
Important: The goal type cannot be changed after creation.
4. Goal Form Fields
| Field | Required | Description |
|---|---|---|
| Type | Yes | Base metric (By Quantity, By C.A., By Product, By Family, New Clients). Cannot be changed after creation. |
| Operation Type | Yes (except New Clients) | Delivery, Order, or Delivered Order. Determines which operations count toward progress. |
| Carrier | Yes | The carrier this goal is assigned to. Select All for a global goal. |
| Fixed Quantity | Depends on type | Target number of units (types By Quantity, By Product, By Family, New Clients). |
| Fixed C.A. | Depends on type | Target revenue amount (By C.A. types). |
| Product | Depends on type | The specific product targeted (By Product type only). |
| Product Category | Depends on type | The product category targeted (By Product Family type). |
| Start Date | Yes | Date from which progress starts being counted. |
| End Date | Yes | Date on which the goal period ends. |
5. Editing a Goal
- In the Goals list, click the pencil icon ✏️ on the goal row.
- Update the desired fields — the type cannot be changed.
- Click Save to apply changes.
6. Deleting a Goal
⚠️ Warning: Deleting a goal is permanent.
- In the Goals list, click the red trash icon 🗑️ on the goal row.
- Confirm the deletion in the dialog that appears.
7. Tracking Progress
Goal progress is visible from:
- The Goals list — the Percentage column shows the current progress rate.
- A carrier's detail page — the Goals section shows a visual progress bar for each active goal, displaying the achieved value vs. the target value.
- Carrier mobile app — the carrier can view their active goals and progress directly from their mobile application.
Progress is updated in real time with each recorded operation matching the goal type.
8. Exporting the Goals List
- In the Goals list, click the Export button in the toolbar.
- The system generates a CSV/Excel file containing the currently displayed goals (based on active filters).
9. Bulk Actions
The goals list supports bulk actions — select multiple goals using the checkboxes, then click the Actions button that appears to perform an operation on all selected goals at once.
Available Bulk Actions
| Action | Description |
|---|---|
| Edit Dates | Modify the start and/or end date for all selected goals |
| Delete Selected | Permanently delete all selected goals (subject to permissions) |
How to Use Bulk Actions
- Select goals: Check the box next to each goal you want to include. You can also use the checkbox in the table header to select/deselect all.
- Open the Actions menu: An Actions button appears above the table once at least one goal is selected.
- Choose an action: Click the button and select the desired action from the dropdown menu.
- Confirm: Depending on the action, a dialog will appear for you to configure and confirm the operation.
Edit Dates (Details)
When editing the dates of multiple goals, a dialog opens with two fields:
- Start date — new start date for the selected goals
- End date — new end date for the selected goals