Operations - Returns
This guide explains how to manage returns in Distritour. A return is an operation where a client returns products to the carrier or the depot.
Table of Contents
1. Accessing Returns
In the left sidebar, navigate to All Operations > Returns to access the return management module.
2. Returns List
The main page displays the list of all returns recorded in the system.
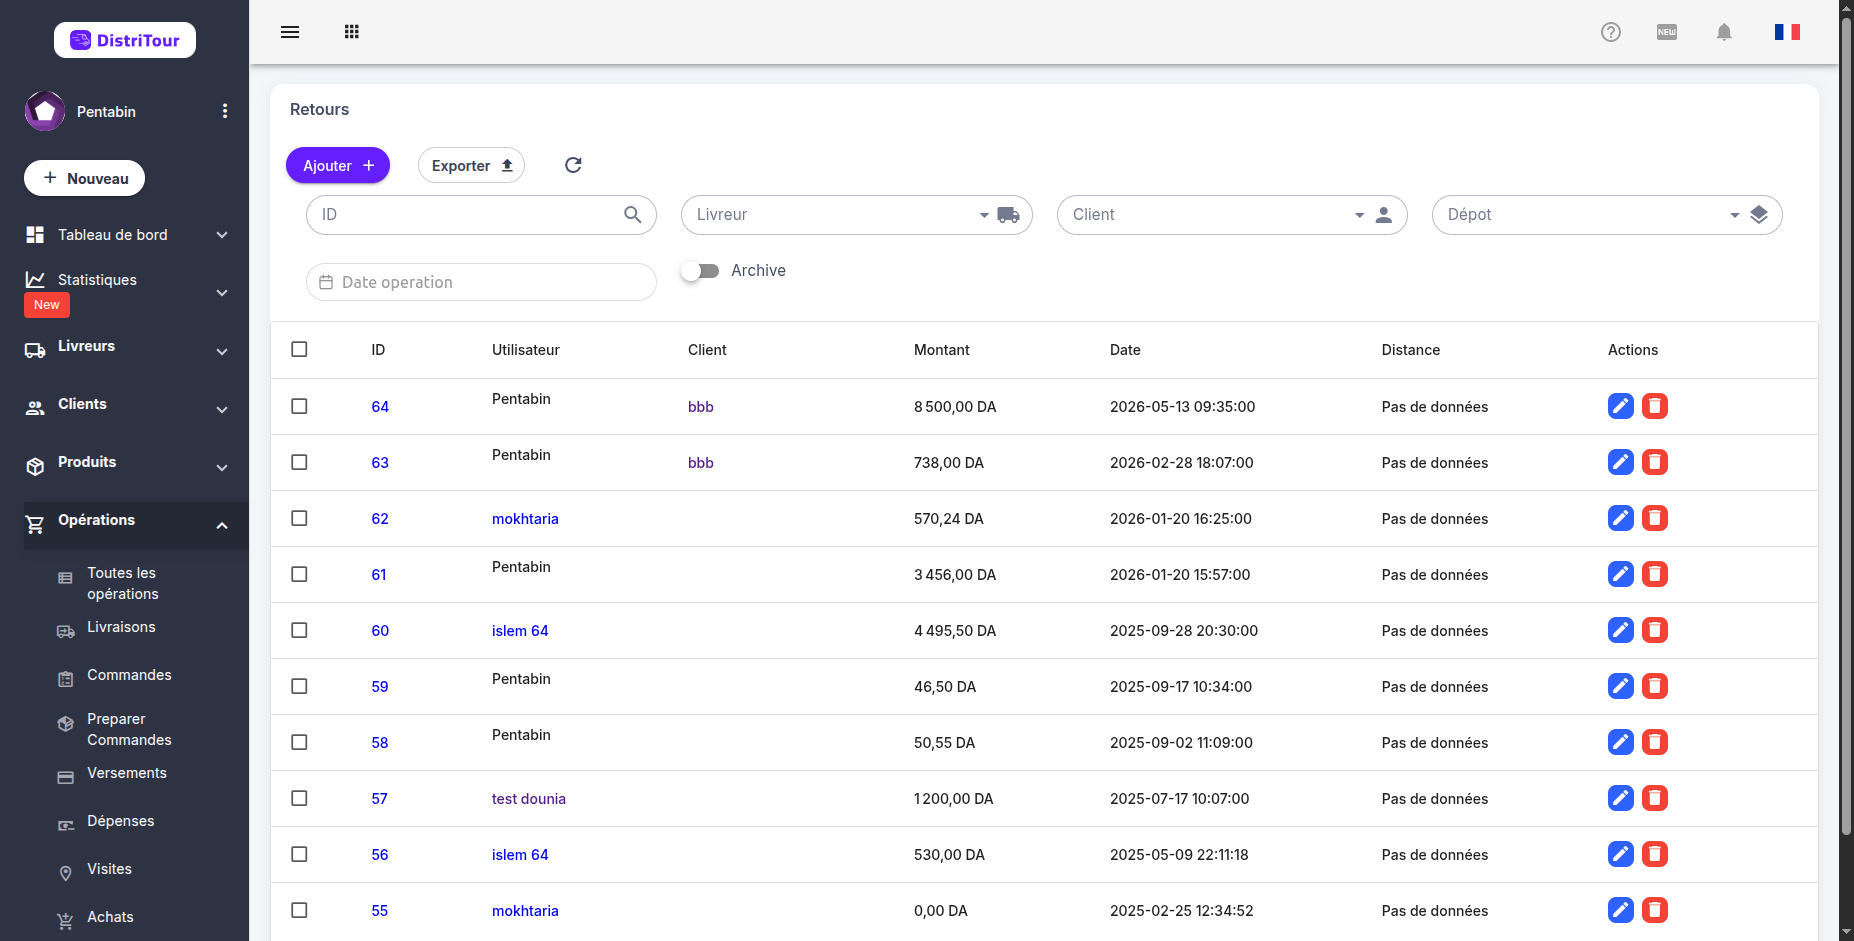
Table Columns
| Column | Description |
|---|---|
| ID | Unique identifier of the return (clickable to view details) |
| User | Carrier associated with the return |
| Client | Client who made the return |
| Amount | Total value of returned products |
| Date | Date and time of the return |
| Distance | Distance between the client and carrier at the time of the operation |
| Actions | Buttons to edit or delete |
Available Filters
- ID — Search by return identifier
- Carrier — Filter by carrier
- Client — Filter by client
- Operation Date — Date range picker
- Depot — Filter by depot
3. Creating a Return
- Click the + Add button at the top of the table.
- Fill in the creation form.
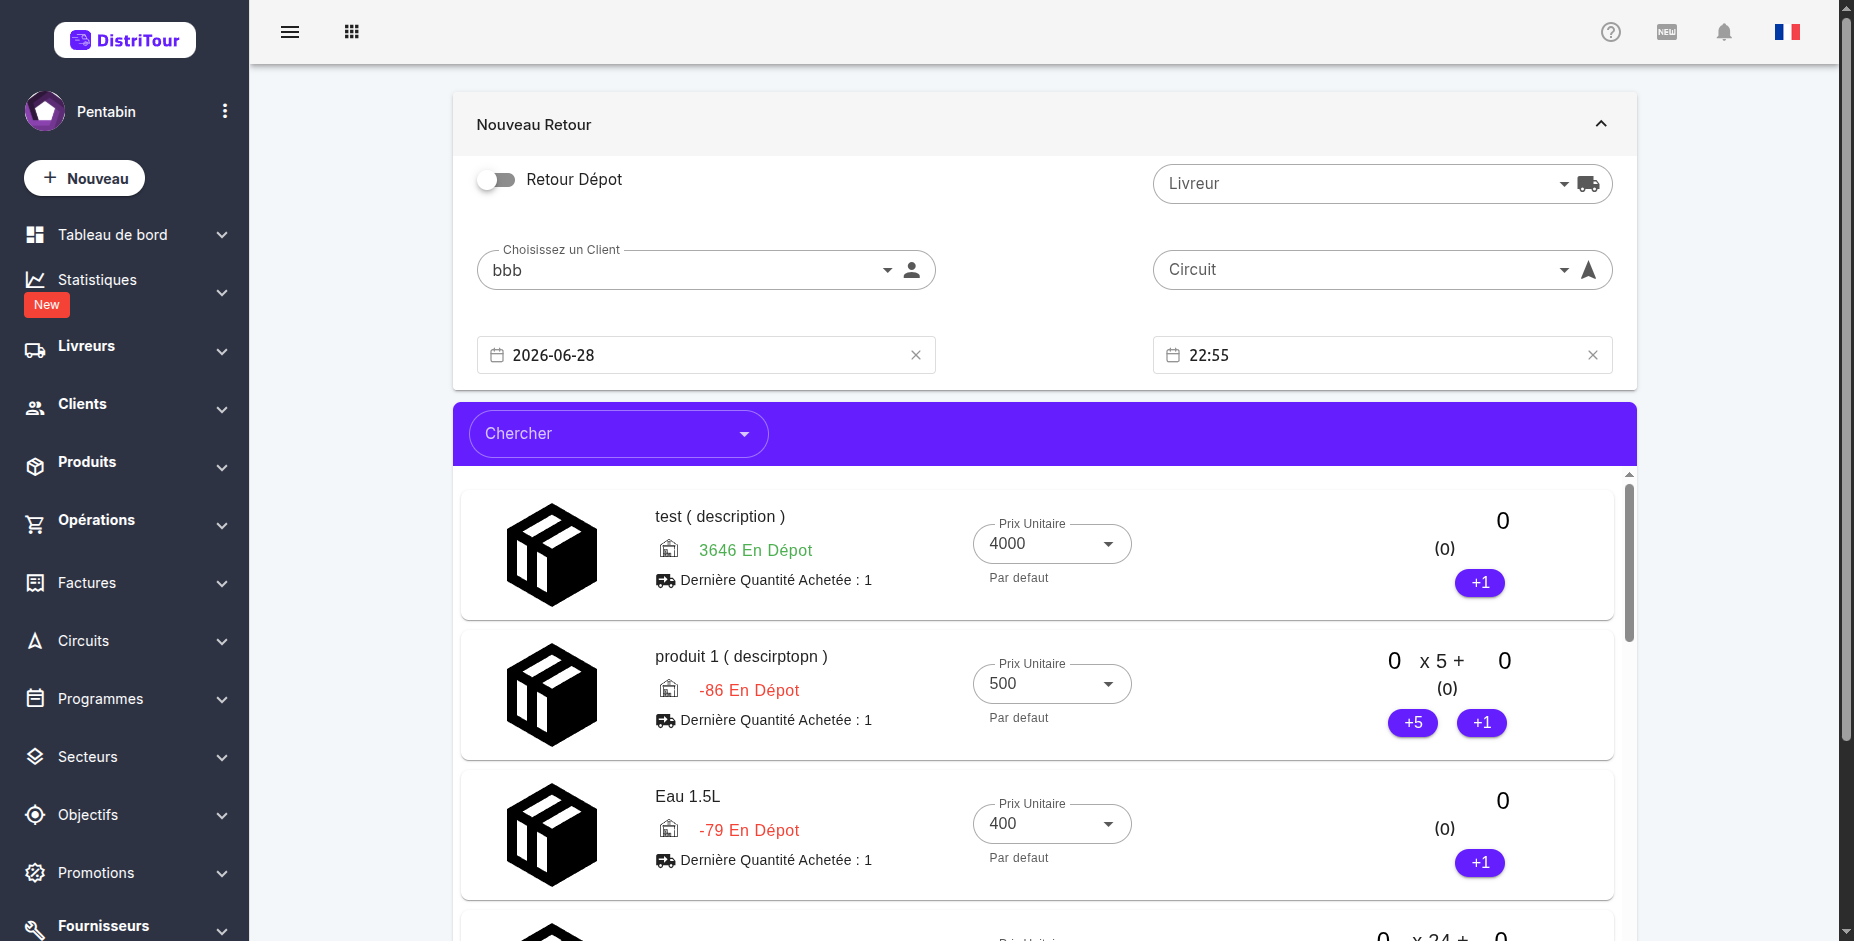
Step 1: Choose Return Type
| Option | Description |
|---|---|
| Retour Dépot | Enable this switch for a direct return to the depot. In depot return mode, no carrier is required. |
- Normal mode (Retour Dépot disabled): Select a carrier and optionally a circuit
- Depot return mode (Retour Dépot enabled): No carrier required, the return is recorded directly into depot stock
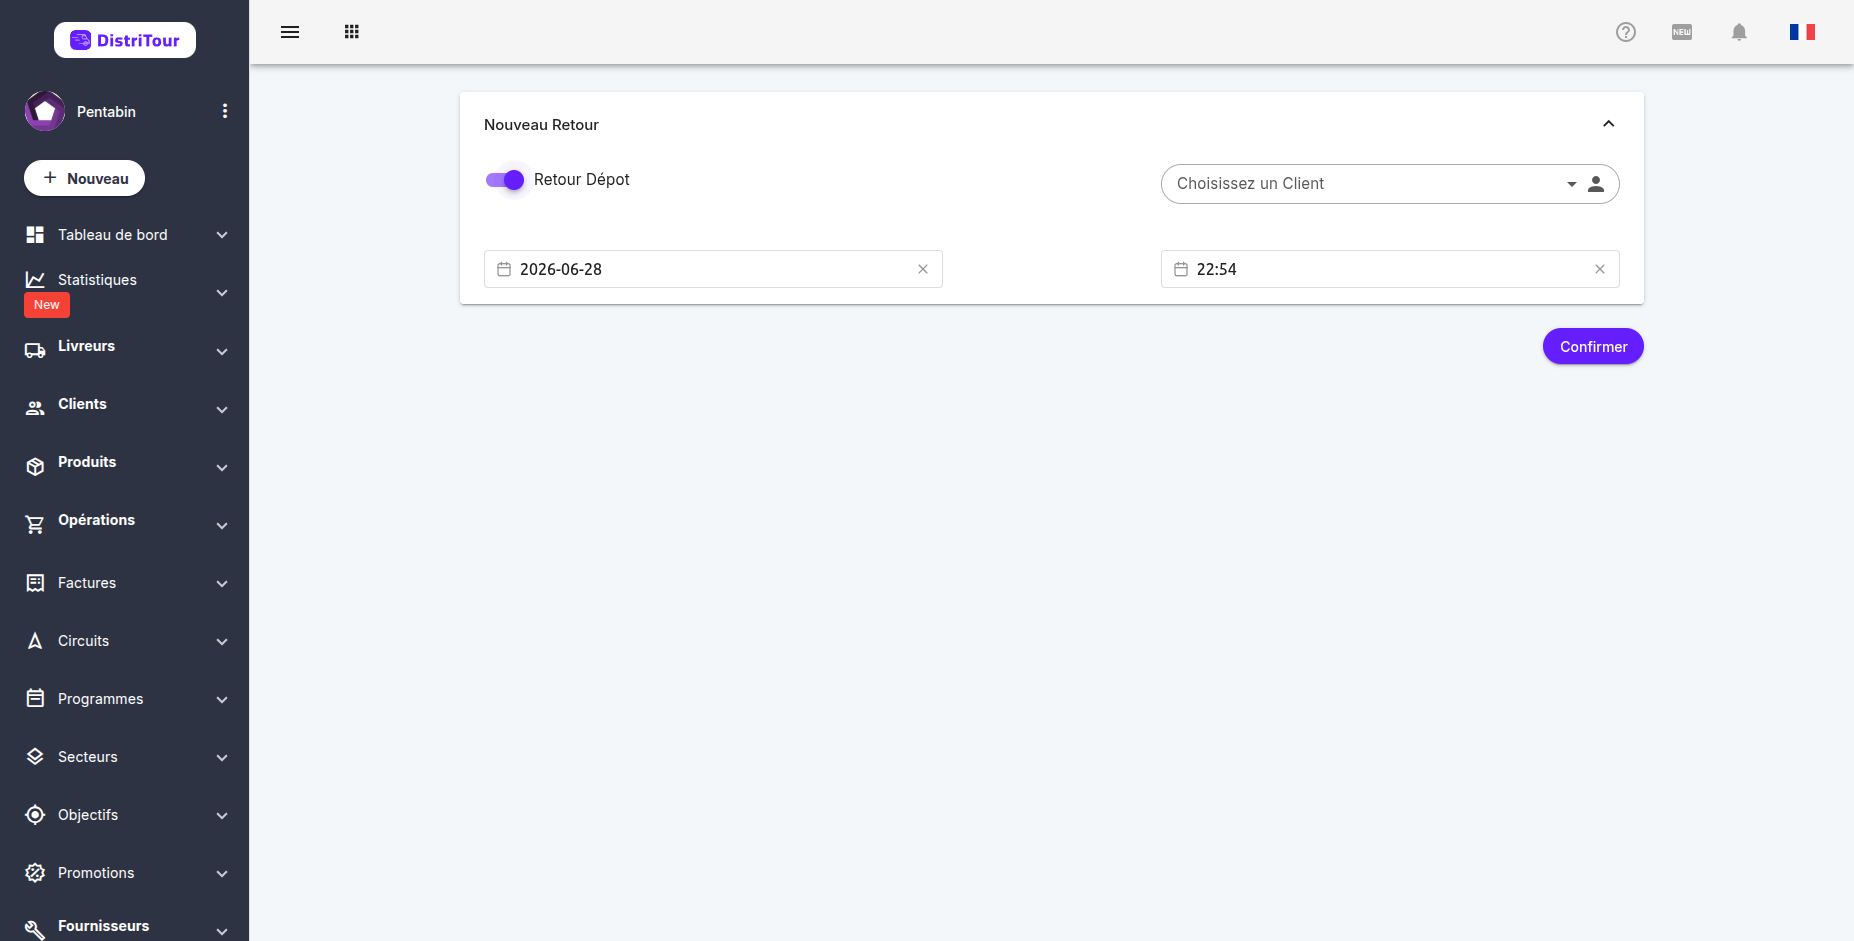
Step 2: Select Client
| Field | Required | Description |
|---|---|---|
| Carrier | Yes* | Select the carrier (*not required if depot return) |
| Client | Yes | Select the client making the return |
| Circuit | No | Circuit associated with this return (optional, not required if depot return) |
| Operation Date | Yes | Date of the return |
| Time | Yes | Time of the return |
Important: Once the client is selected, the list of available products automatically appears below.
Step 3: Add Products
After selecting the client, the product list appears automatically:
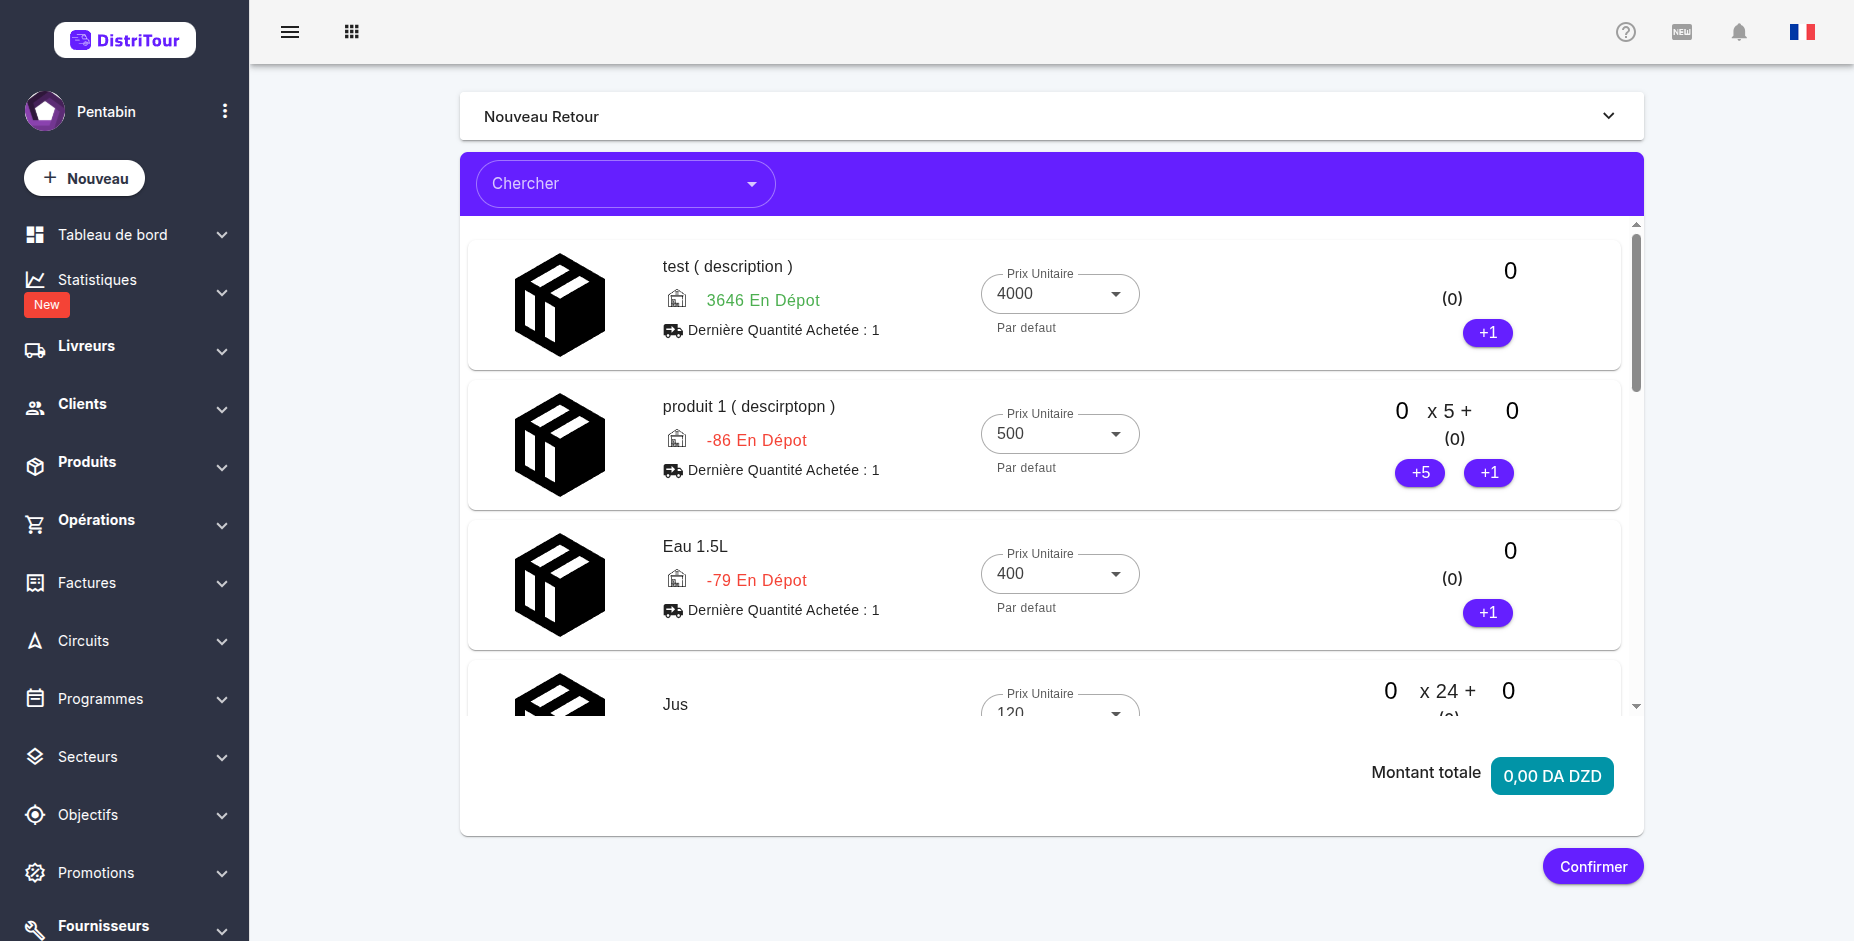
For each product to return:
- Search: Use the search bar to filter products
- Unit Price: The price fills automatically (modifiable if needed)
- Quantity: Enter the quantity to return using the field or the + buttons
- Dernière Quantité Achetée (Last Purchased Quantity): Shown under each product — indicates the last quantity this client purchased for that product. Useful as a reference when estimating how much to return.
- The Total Amount updates automatically at the bottom of the list
Option: Defective Product
As soon as a quantity is entered for a product, a Défectueux (Defective) toggle appears under that product:
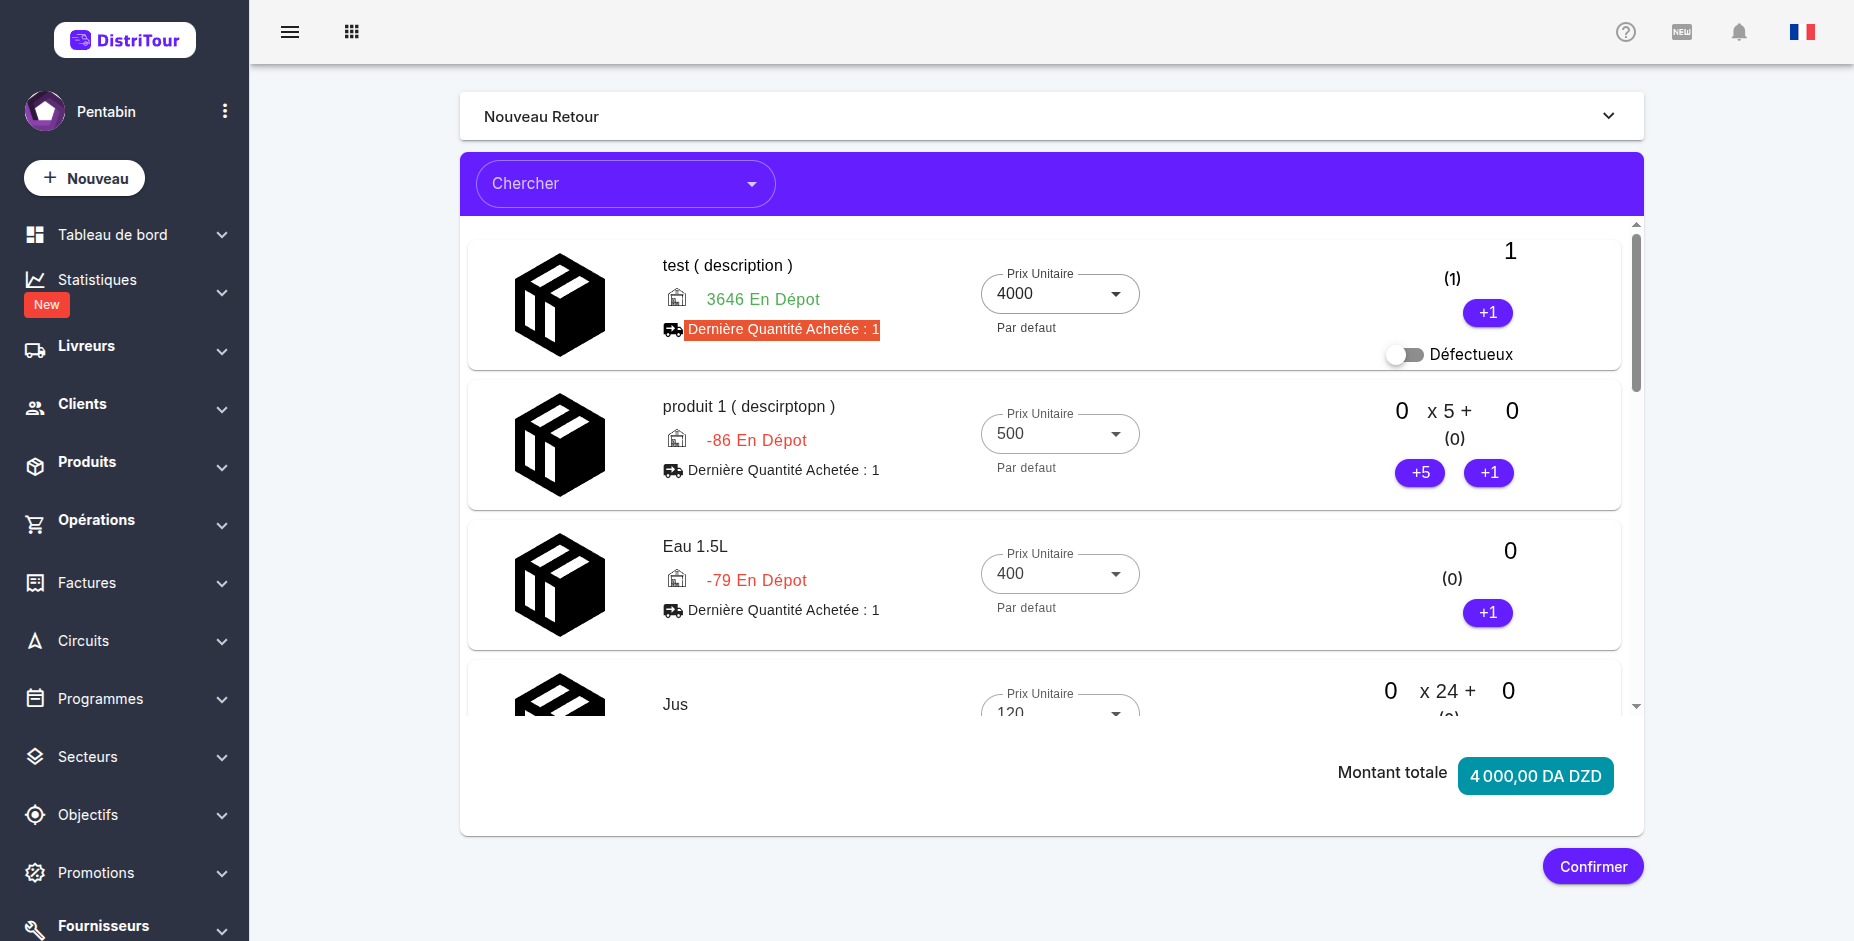
| State | Description |
|---|---|
| Disabled (default) | The returned product is in good condition — it will be returned to stock |
| Enabled | The product is defective or damaged — it will not be returned to stock |
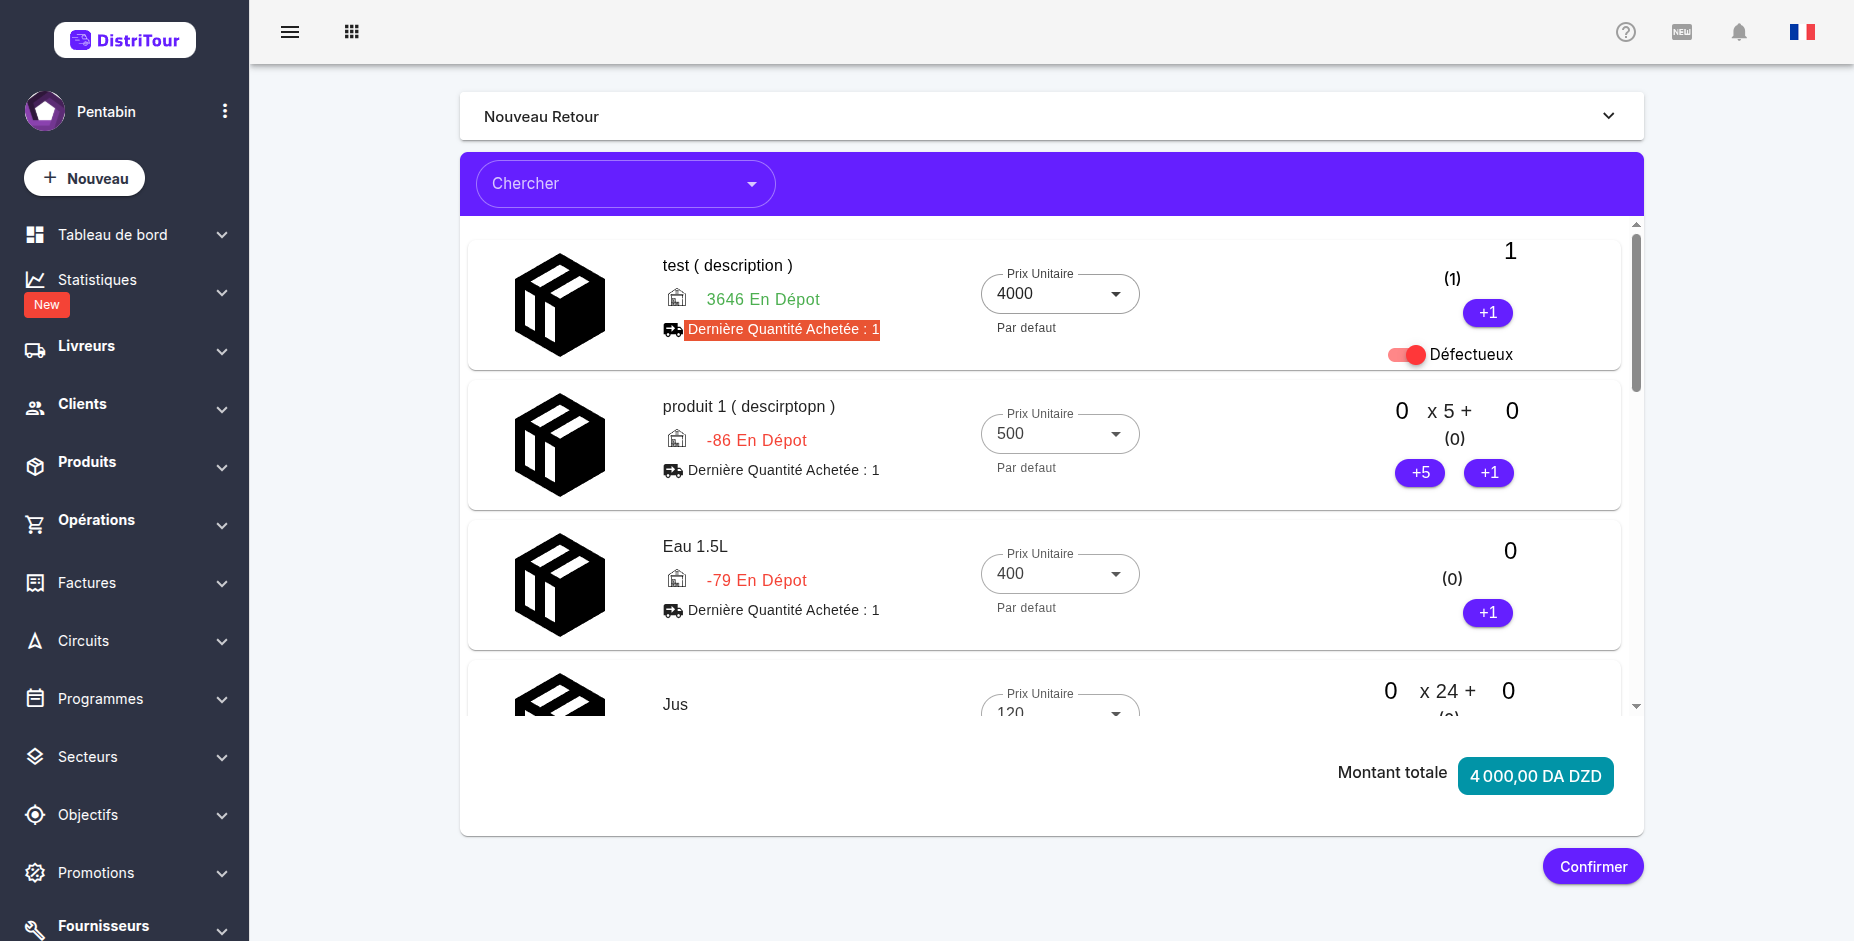
Important: Enable Défectueux for any damaged product to prevent it from being put back on sale in stock.
Step 4: Confirm and Save
Before confirming, verify:
- The selected products and their quantities
- The total amount displayed at the bottom
Click Confirmer to finalize the return.
4. Editing a Return
- In the list, click the ID or edit button of the return.
- The form opens with the current data.
- Modify the desired information.
- Click Save to apply the changes.
5. Deleting a Return
⚠️ Warning: Deleting a return is permanent and affects stock and statistics.
- In the list, find the return to delete.
- Click the delete icon in the Actions column.
- Confirm the deletion in the dialog box.
See Also
- Deliveries - Product deliveries to clients
- Orders - Client orders