Operations - Payments
This guide explains how to manage payments in Distritour. A payment is a financial operation that records a client collection or a supplier disbursement. Payments allow you to track financial flows and adjust third-party balances.
Table of Contents
- Accessing Payments
- Payments List
- Creating a Client Payment
- Supplier Payments
- Editing a Payment
- Deleting a Payment
- Bulk Actions
1. Accessing Payments
In the left sidebar, navigate to All Operations > Payments to access the client payment module. For supplier payments, navigate to All Operations > Payments Supplier.
2. Payments List
The main page displays the list of all payments recorded in the system.
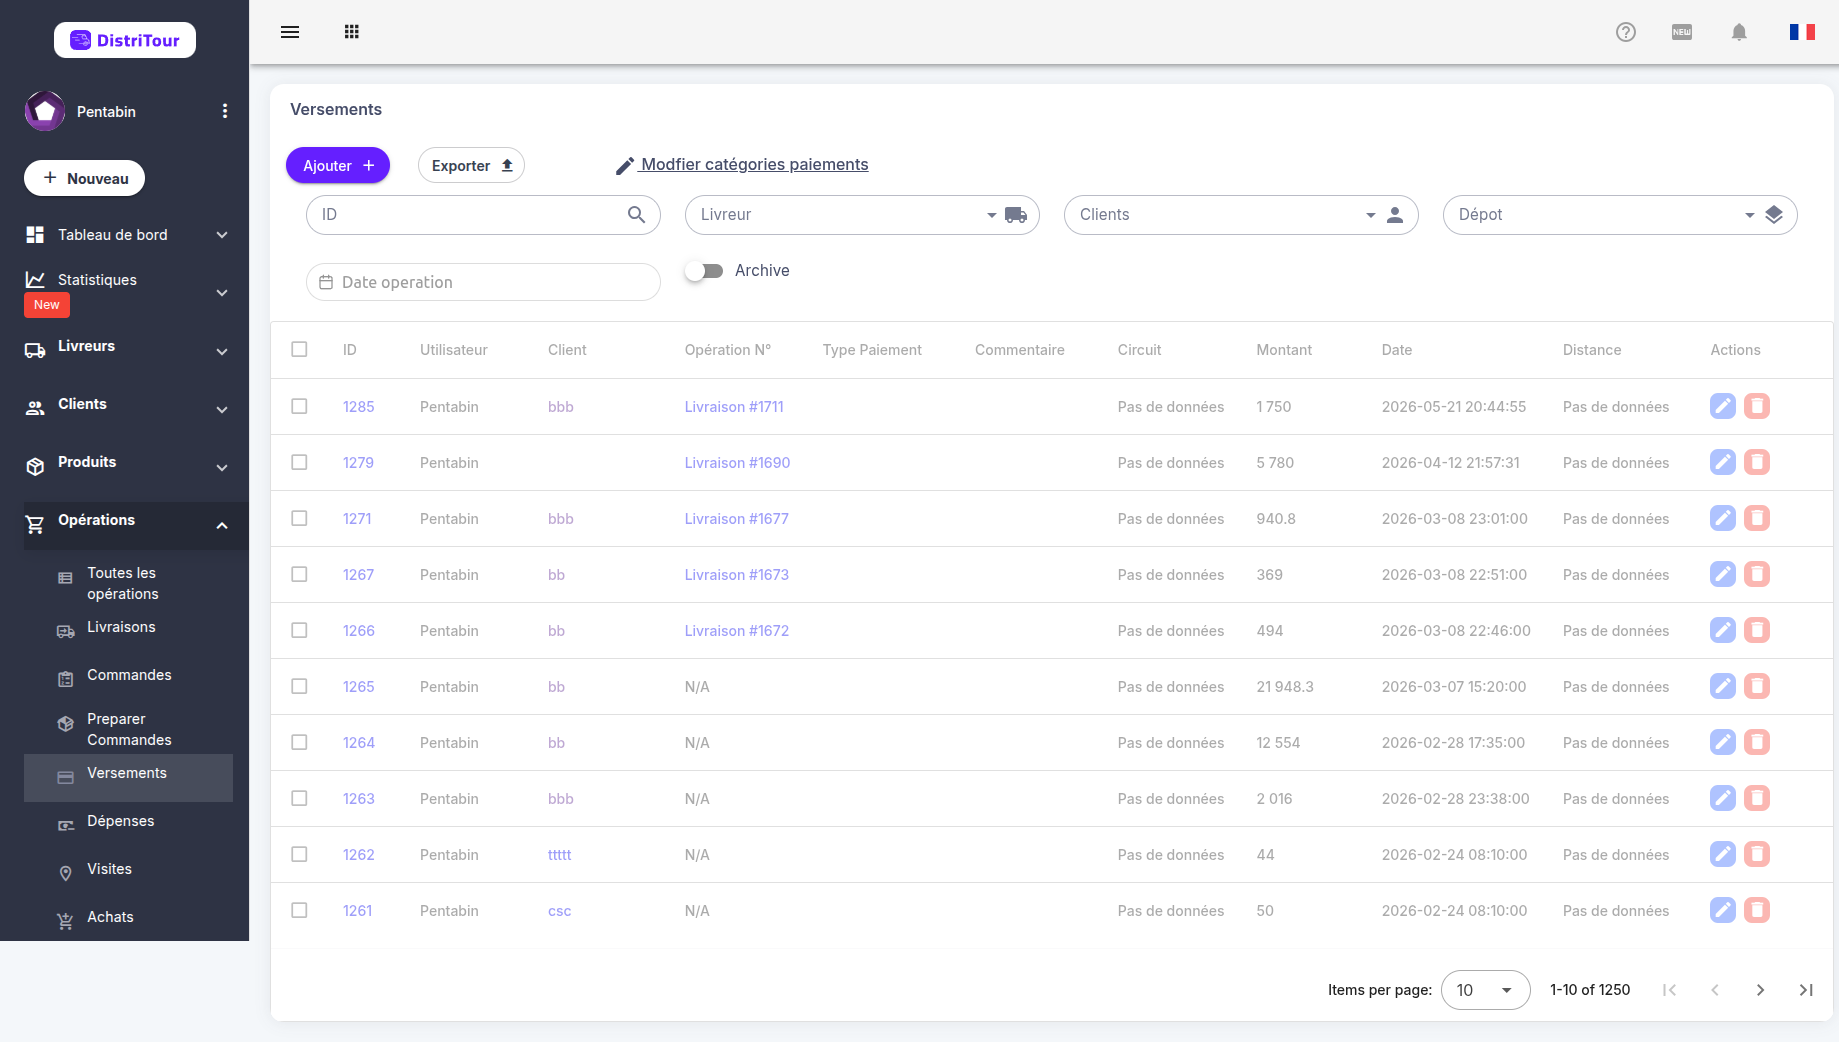
Table Columns
| Column | Description |
|---|---|
| ID | Unique identifier of the payment (clickable to view details) |
| User | Carrier associated with the payment (if applicable) |
| Client | Client who made the payment |
| Parent Operation | Delivery or order associated with the payment (if applicable) |
| Circuit | Circuit this payment belongs to (if applicable) |
| Amount | Payment amount |
| Date | Date and time of the payment |
| Distance | The distance between client and carrier at the time of the operation |
| Actions | Buttons to edit, delete, and additional actions menu (⋮) |
3. Creating a Client Payment
- Click the New button at the top of the table.
- Fill in the creation form:
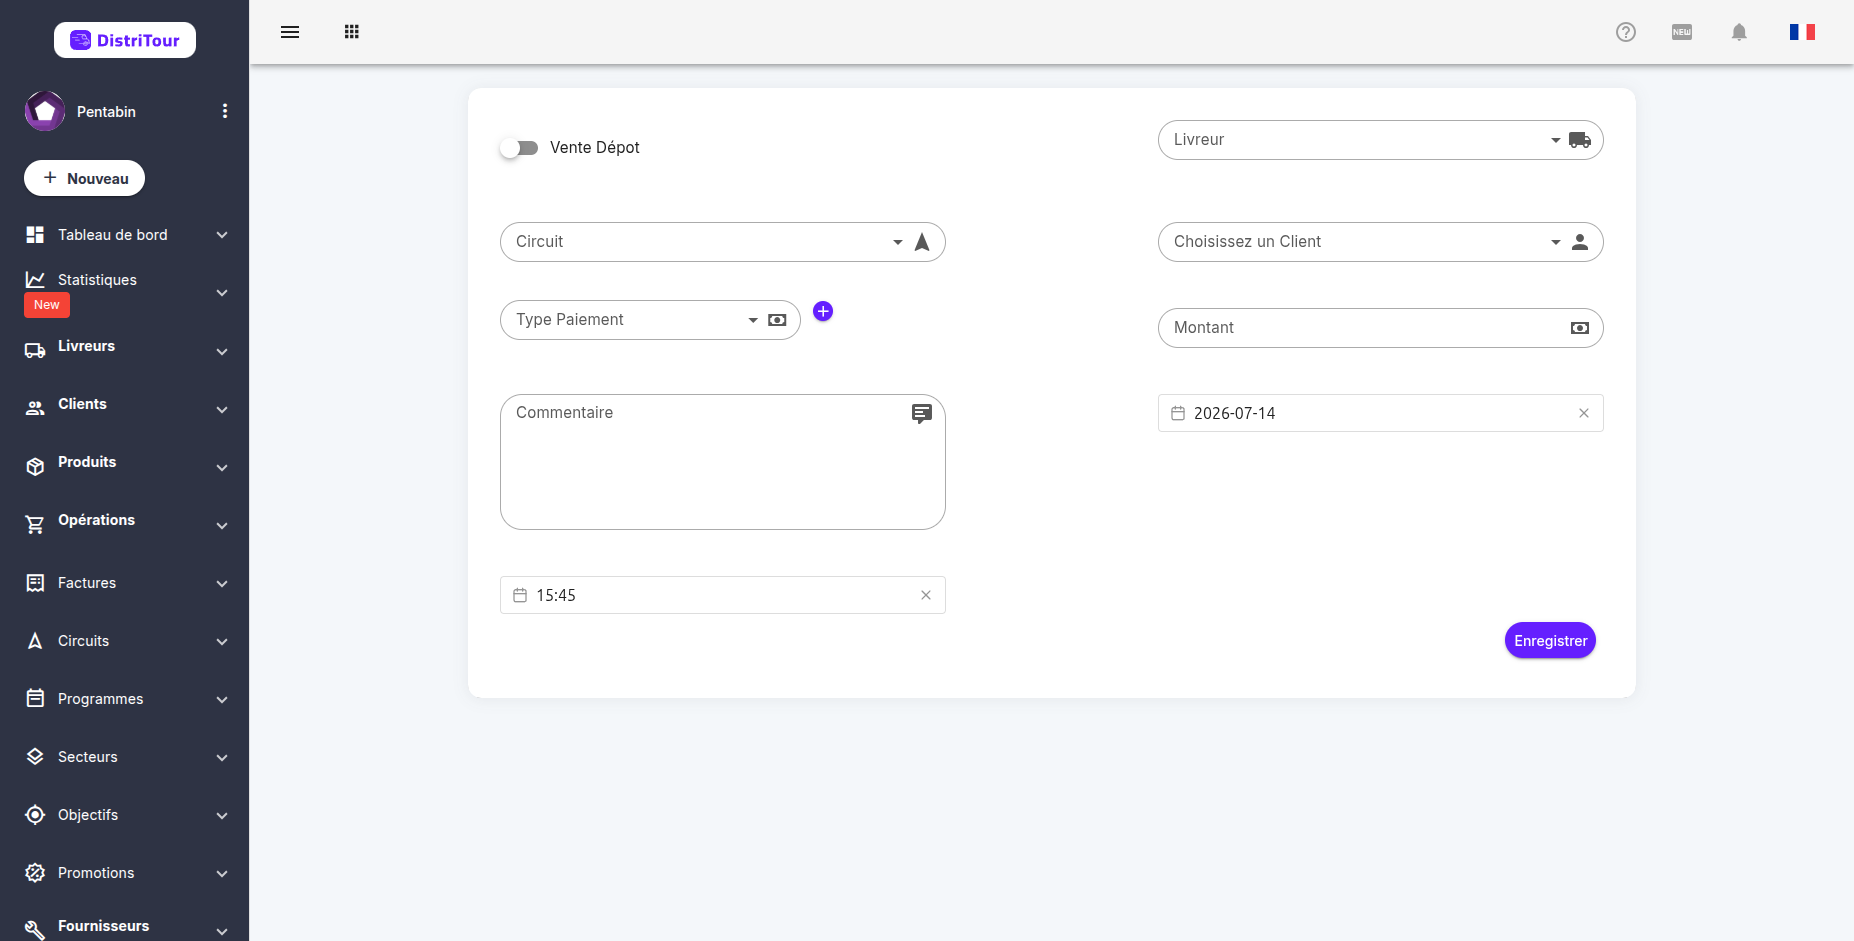
Form Fields
| Field | Required | Description |
|---|---|---|
| Depot Sell | No | Enable this switch for a payment without an associated carrier |
| Carrier | Yes* | Select the carrier (*not required if depot sell) |
| Circuit | No | Circuit associated with this payment (optional) |
| Client | Yes | Select the client from the dropdown list |
| Payment Type | No | Payment category (e.g., Cash, Check, Transfer) |
| Amount | Yes | Payment amount |
| Comment | No | Note or description of the payment |
| Date | Yes | Payment date |
| Time | Yes | Payment time |
Note: The payment type can be customized via the + button next to the field. You can create new payment categories as needed.
- Click Save to finalize the payment.
4. Supplier Payments
The Payments Supplier module works similarly but is dedicated to disbursements to suppliers.
Access
In the left sidebar, navigate to All Operations > Payments Supplier.
Creation Form
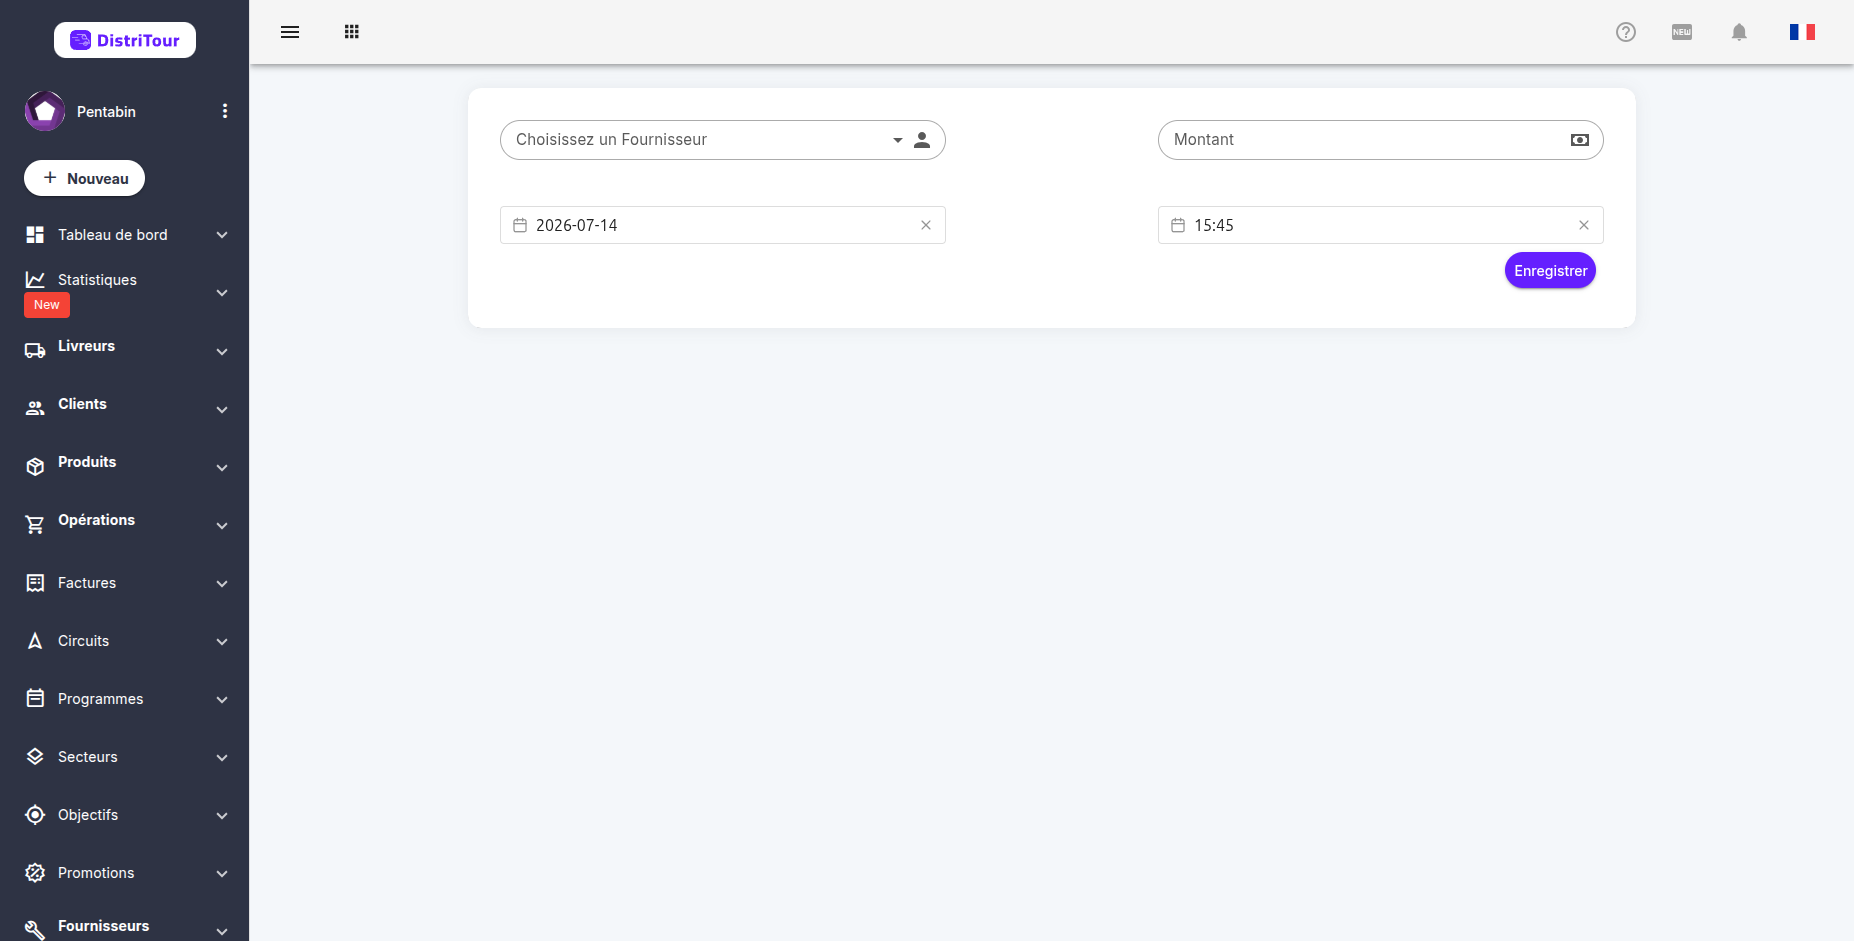
| Field | Required | Description |
|---|---|---|
| Supplier | Yes | Select the supplier from the dropdown list |
| Amount | Yes | Payment amount to the supplier |
| Date | Yes | Payment date |
| Time | Yes | Payment time |
5. Editing a Payment
- In the list, click the ID or edit button of the payment.
- The form opens with current data.
- Modify the desired information.
- Click Save to apply the changes.
Warning: A validated payment may have locked fields (client, carrier).
6. Deleting a Payment
⚠️ Warning: Deleting a payment is permanent and affects balances and statistics.
- In the list, select the payment to delete.
- Click the delete icon in the Actions column.
- Confirm the deletion in the dialog box.
7. Bulk Actions
The payments list supports bulk actions — select multiple payments using the checkboxes, then click the Actions button that appears to perform an operation on all selected payments at once.
Available Bulk Actions
| Action | Description |
|---|---|
| Download Notes | Downloads a PDF summary for all selected payments |
| Delete Selected | Permanently deletes all selected payments (subject to permissions) |
How to Use Bulk Actions
- Select payments: check the box next to each payment you want to include. You can also use the checkbox in the table header to select/deselect all.
- Open the Actions menu: an Actions button appears above the table once at least one payment is selected.
- Choose an action: click the button and select the desired action from the dropdown menu.
- Confirm: depending on the action, a dialog appears for you to configure and confirm the operation.
See Also
- Deliveries - Deliveries can include payments
- Client Management - View client balances
- Cash Registers & Movements - Track cash movements